Have you ever desired to know How to Connect AWeber to WordPress site? If Yes, then come along with us. AWeber is the most popular email marketing service on the Web. Here, in this complete guide, we will illustrate to you how to connect AWeber to WordPress.
Why Email List is Important?
Have you ever wondered why all the popular sites like Twitter, New York Times, Facebook, want your email address?
Email is the best method to reach your customers. However, everyone has not a Facebook or Twitter account. But everyone has an email address. Most people check their emails many times a day. With the enabling push notifications on the phone, people are hooked up to their email 24/7.
Email gives you close and personal access to your customers compared to any other marketing or communication device available today.
Now let’s take a look at how you can get started with AWeber to build your email list.
What is AWeber?
AWeber is the best email marketing service provider. Unlike your personal email service provider (Gmail, your ISP, webmail services), AWeber specializes in sending the large-scale email.
You can use it to send regular email updates to your blog clients. This is a paid service and starts at $19/month for a price of 500 subscribers and unlimited emails. As part of the test, you get the first month for free.
How to Setup AWeber?
First, go to the AWeber website and sign up for an account.

You will be asked to provide personal and credit card information.
Keep in mind that, AWeber provides a free 30-day trial. If you cancel before the trial period, your credit card will not be charged.
After signup, you have to click the Get Start button to continue.

You will be asked to provide your company name, website, and address. This address will display below your email.
Although a valid postal address is needed by the CAN-SPAM Act. This improves your email deliverability and protects you against spam filters.

Thereafter, you have to enter the sender’s name and email address. This name and email address will be used in outgoing email for your list.

Press the next step button to continue.
Here, you will be asked to provide names and descriptions for your email list. This name and description will be used internally and will help you find your email list in the AWeber dashboard.
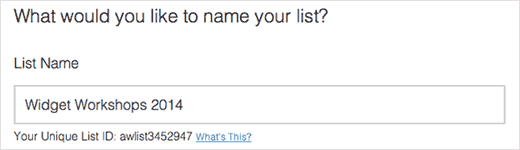
Press the next step button to continue.
You have to choose a subject line for the confirmation email. This email is sent to users to verify their email address when they sign up for your email address.
AWeber will give you a list of pre-approved subject lines. Also, you can select that person who meets your needs.
Also, you can create your own subject line. However, to prevent misbehavior and spam, and AWeber staff will have to approve your custom subject line. This can take at least 1 business day.

Press the Create List button to continue.
Now you created an AWeber account successfully and also created your first email list.
We will now describe to you how to add AWeber email signup forms to WordPress.
Adding AWeber Sign up Forms
There are several ways to add an AWeber email signup form to WordPress. The default AWeber sign-up forms that you can copy and paste from your AWeber account.
Also, there are highly customized signup forms created with OptinMonster. These signup forms will give you many more signups. See how we increased our email subscriber to 600% by using OptinMonster.
Also, there are custom signup forms which you can create with WPForms the beginner-friendly contact form plugin for WordPress.
Here, in this guide, we will describe to you all these methods. Let’s get started.
Default AWeber Sign up Forms
However, AWeber comes with a handy tool that allows you to create your own signup form and add it to your WordPress site.
just log in to your AWeber site and click the signup form.
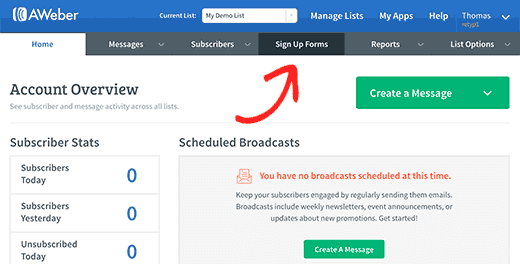
On the next page, press the create a new signup form button to continue.
Moreover, it will bring you to the Form Builder Tool of AWeber. It comes with easy templates that you can select as the starting point. You can then edit the form by clicking on an item in the live preview.
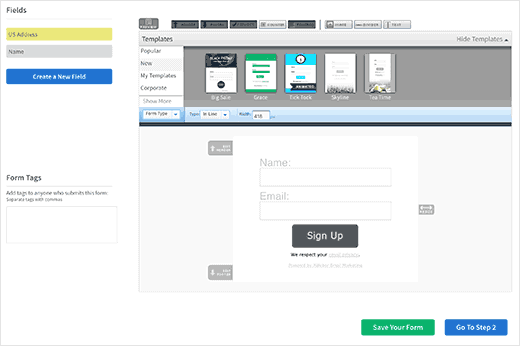
Once you are satisfied with the form design, then you have to press the go to step 2 button.
It will bring you to the form settings. When you fill out the form, you can choose what happens. The best option is to redirect them to a page on your own site.
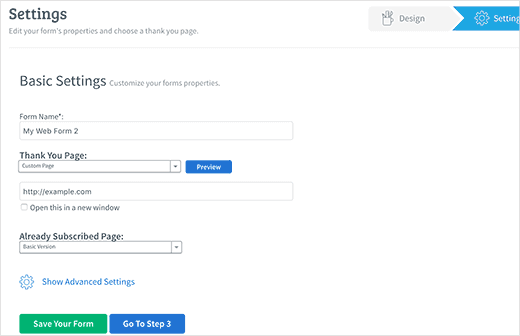
The next option is what happens if a user is subscribed already. You can then create a page on your WordPress site and redirect users there.
Now press the go to step 3 button.
Save your form and click on ‘I will install my form’.
Now AWeber will show you the two sets of codes that you can add to your WordPress website to show the signup form.
Press the ‘Raw HTML Version’ and copy the code.

Now you need to visit your WordPress admin area and click on Appearance>>Widgets.
However, drag and drop the text widget to the sidebar from the list of available widgets, where you want your signup form to appear.
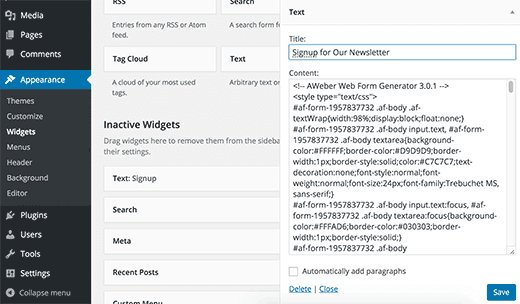
Paste the signup form code copied from AWeber to the text area of the widget. Click the Save button to store your widget settings.
That’s all!
Now you can go to your site to see the signup form in action.
Adding AWeber Sign up Forms with OptinMonster
However, to add a basic AWeber signup form into WordPress is very easy and simple. Although, basic forms are not ideal for high conversions.
You need the forms that people notice to your signup form.
This is where the optinmonster comes. This is the most popular lead generation tool in the market. This permits you to create beautiful sign-up forms that are easily noticeable, highly attractive and incredibly powerful.
The OptinMonster comes with various types of signup forms like exit-intent popups, floating bar, after post form, sidebar form, slide-in form, full-screen welcome gate, etc.
Although, it always comes with powerful features such as Scroll Detection, Page Level Targeting, MonsterLinks (2-Step Options), A/B Testing, etc.
However, OptinMonster works with all popular email marketing services including AWeber.
Adding AWeber Sign up Form by Using WPForms
WPForms is the most interactive friendly contact form plugin for WordPress.
Also, it always comes with an AWeber addon, that permits you to add AWeber to your contact form or create a custom AWeber signup form anywhere on your WordPress site.
Step 1: Install AWeber Addon
The first thing, you have to install the WPForms plugin and then activate it. For more details, click on how to install a WordPress plugin.
When the plugin is installed, just go to WPForms>>Add-ons page. And click the Install Addon button that is next to AWeber Addon.
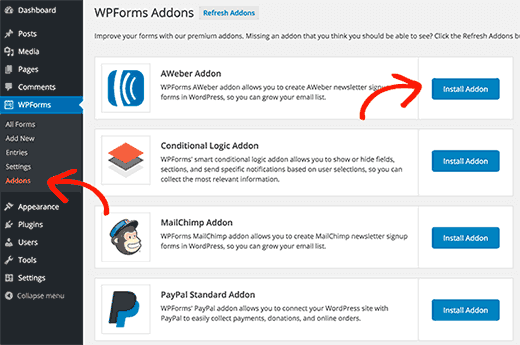
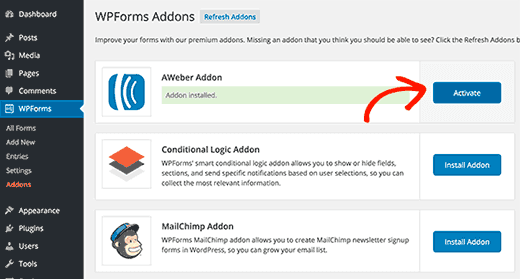
Moreover, the WPForms will fetch and install the Addon. And then will display you a success message. Thereafter, you have to click the Activate button to start by using AWeber Addon with WPForms.
Step 2: Connect WPForms to Your AWeber Account
Now that you have installed AWeber addon successfully, then the next step is to connect your website to your AWeber account.
Go to the WPForms>>Settings page and click the Integration tab.
There you will find the AWeber integration option. By clicking on it will display the ‘Add Account’ button, which will display two fields.
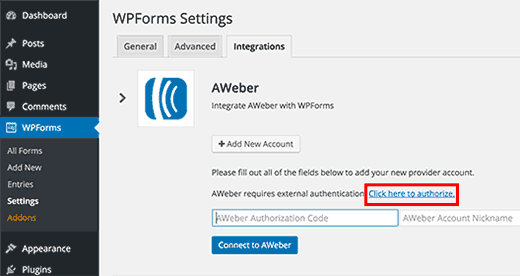
Also, you will see a link labeled ‘Click here to authorize’. By clicking on the link will open a popup window where you will be asked to sign in to your AWeber account.
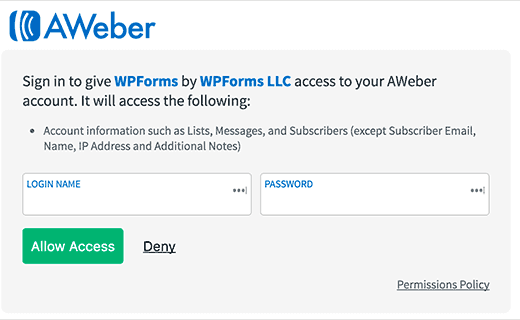
Once you entered your AWeber account username and password after that click the ‘Allow Access button’.
Now AWeber will verify your credentials and then show you an authorization code.
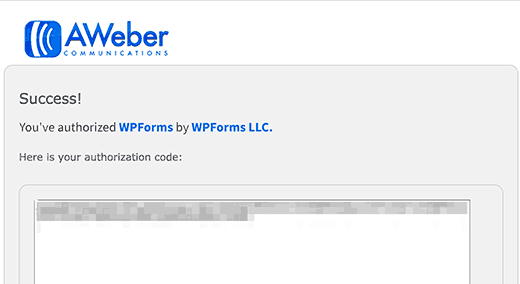
Copy the code and paste it into the WPForms Settings page. You can use anything in the Account Nickname field. After that, click the Connect to AWeber button to continue.
Now WPForms will connect to your AWeber account. It will show the ‘connected’ status that is next to your AWeber integration.
Step 3: Creating AWeber Sign up Forms with WPForms
Go to the WPForms>>Add New to create a new form.
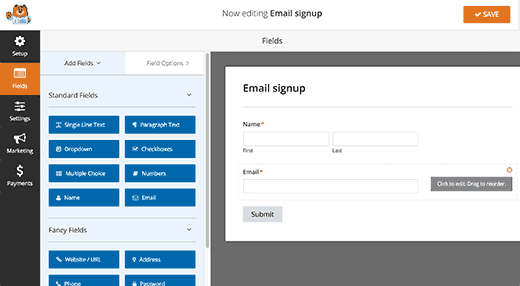
However, WPForms always come with easy and simple templates to create the most common forms. From these, one of the templates is a newsletter signup form, that comes pre-populated with email signup form fields.
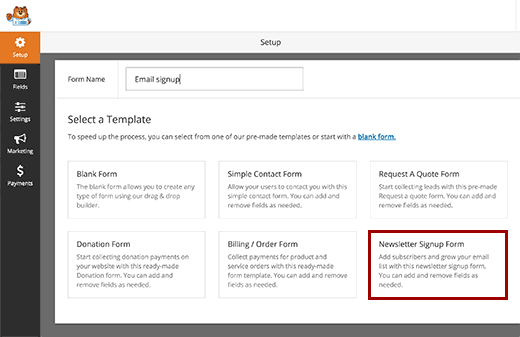
By clicking on it will launch the Form Builder where you can edit the form. You can add or remove fields in your form, add the description, add details, rearrange them, etc.
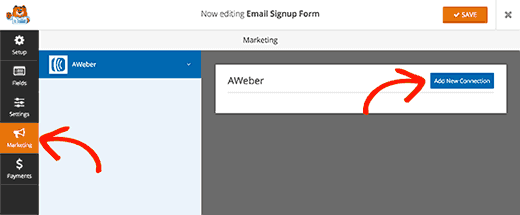
After you are satisfied with your form, click the Marketing tab and then click on AWeber. You have to click the ‘Add new connection’ button.
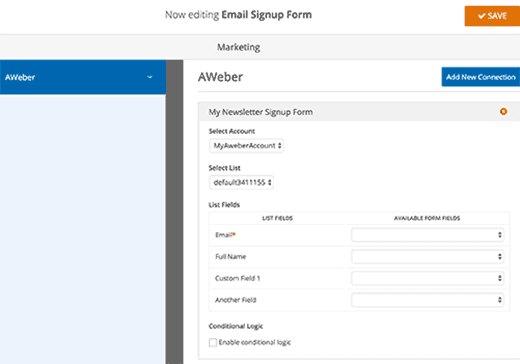
Now you will be asked to provide a nickname for this connection. You can use your favorite nickname.
Now WPForms will fetch your AWeber account information. You must choose your AWeber account and email list that you want to use.
After that, you will have to choose the field that you want to add to your form field.
Press the save button. Now you can exit form builder.
Step 4: Embedding Form in WordPress
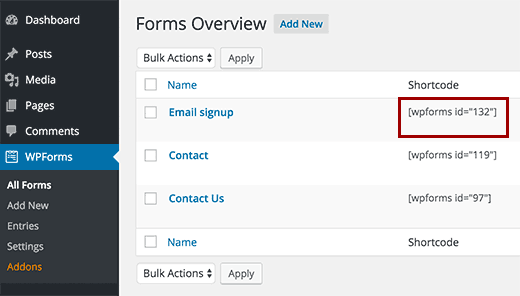
There are several ways to add your AWeber signup form. WPForms permits you to add the form to any WordPress post, page or widget by using the shortcode.
You can find the shortcode by going to the WPForms>>All Forms page.
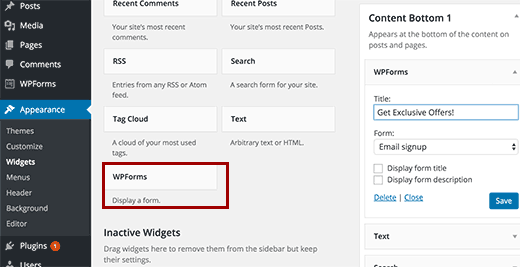
Also, you can use the WPForms widget to embed the form in the sidebar. Go to the Appearance>>Widgets page.
Under the list of widgets that are available, you will find WPForms widget. You have to add this widget to the sidebar where you want your signup form to appear.
Send WordPress Posts to AWeber Email List
Although, AWeber makes it easy and simple for sending a new WordPress post to your email subscribers. Here’s how to set up WordPress RSS in the AWeber Newsletter.
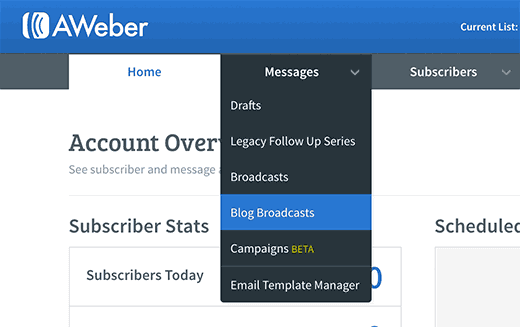
Thereafter login to your AWeber dashboard and then click the Messages>>Blog Broadcast.
On the next screen, click the Create broadcast button to continue.
Now you will be asked to provide the RSS feed URL of your WordPress site and select a subject line.

After this, you can choose a template from the left and click the load template button. You will see that the HTML area will automatically be filled with the template.
Also, you can continue to edit this template or scroll down to the bottom and start setting up how to send new feed items to your users.
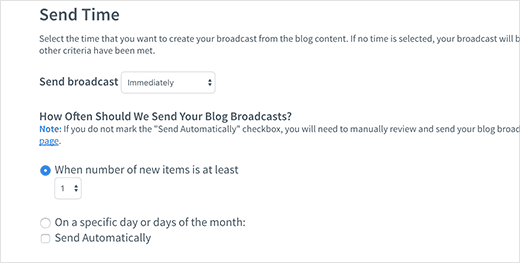
Once complete, just click on the broadcast button below.
Now AWeber will automatically send a new blog post to your email list users.
Conclusion
Wrapping this all end! We have discussed How to Connect AWeber to WordPress? Often, we concluded its definition and how to set up it?
We hope this post helped you to integrate AWeber to your WordPress site. If you have any questions about integrating this, let me know in the comments section below.
If you liked this post, please share it with your peers.
You can contact our WordPress Support Team Dial +1-888-738-0846 (Toll-Free). The door to our WordPress customer service is always open for you. We will be pleased to help you and solve the issue related to WordPress.
That’s all, thanks!
Read More Blogs: