
In this Post, my discussion will be focused on How to easily Add Email Subscription Option in WordPress Comments. This will also increase your Email Subscribers. Thus, getting new readers or customers on your website is very important nowadays. Because it actually brings more leads and attracts users to us.
However, you may add subscribe to newsletter option in WordPress Comments. With or without the help of the plugin. Well, by default, WordPress does not offer such configuration.
Thus, this is what we are elaborating here! Keep reading….
Read Also: 10 Email Marketing Mistakes WordPress Users must Avoid
Why Add Subscribe Option to Newsletter in WordPress Comments?
As we all know that social media is a great way to communicate with your readers. However, email is the most reliable and direct way of communication. Thus, by providing an email subscription to your blog post. You may create a steady stream of regular visitors to your Website. Where, the articles posted by the admin of a WordPress site are called posts.
As, WordPress Administrator has full power over the site and can do everything related to the administration of the site. Administrators can create more Administrators, invite new users, remove users, and change user roles.
Similarly, all internet marketer wants to increase their email list nowadays. And there is no argument over this. The more email subscribers result in lead generation in the cooperative industry.
Thus, looking at this all, we can say that we need to add subscribers option to the newsletter. However, for adding this let’s move!
Adding Email Subscription Option in WordPress Comments
Adding this can be performed in two manners. First — manually, Second — by using a plugin. Now, let’s go through the manual process which is discussed as follows:
Since FeedBurner is used by many people. But we will use it in this manual method.
1. Add Email Subscription Manually
Performing this method, you need to follow the following illustrated steps:
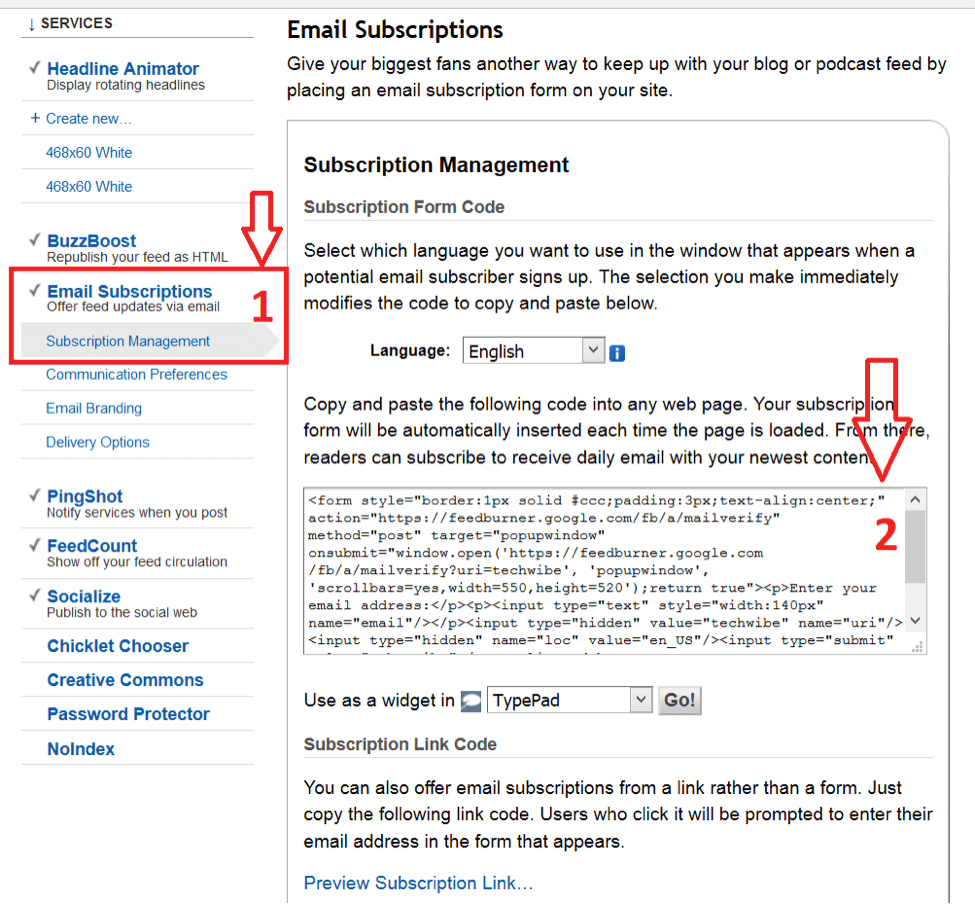
Step 1. The very first thing you need to do is log in to your FeedBurner account. And after that, follow the path as publicize >> Email Subscriptions. However, you can see the subscription form code as shown in the picture below. Now, all you need to do is just copy the code from your working window.
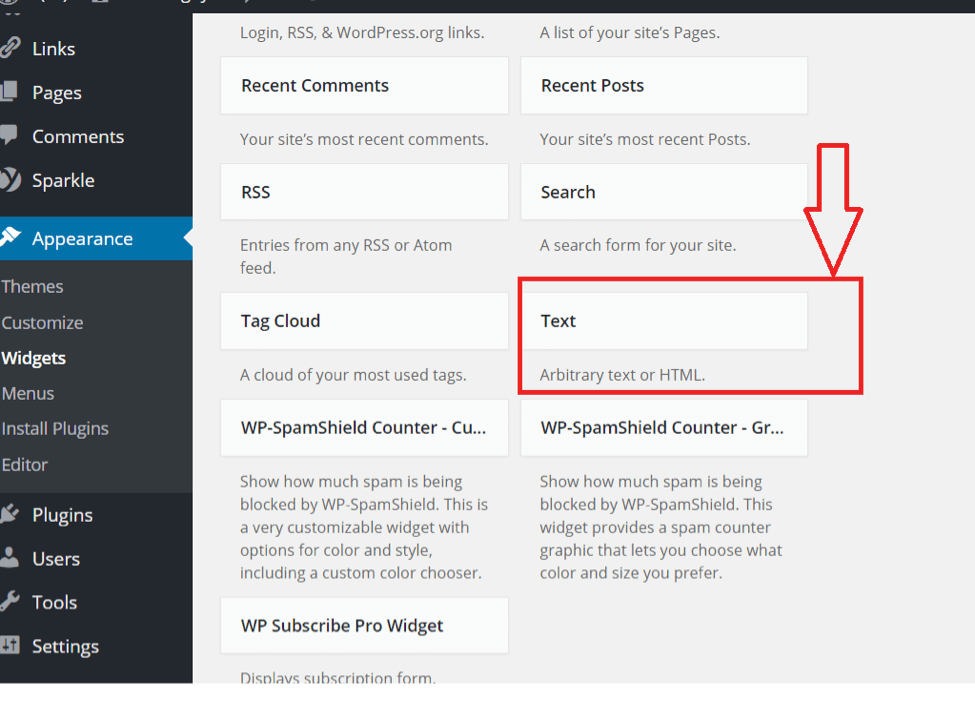
Step 2. Thereafter, login to your WordPress Admin Dashboard. And follow the path as Appearance >> Widgets. And drag the text elements from the inactive section to the sidebar as shown in the image below.
Step 3. Thus, you need to paste the code into the content section. And do not forget to save it.
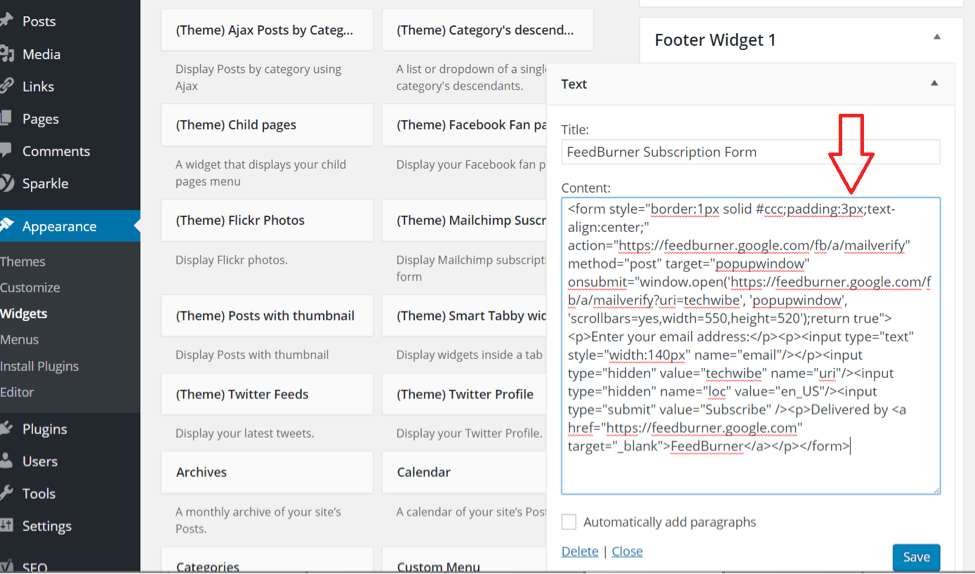
Step 4. Thereafter, refresh your WordPress Website. And now you are all set!
Step 5. Now if you want to show this simple form below the post in your blog post. Then, just paste the code into the appropriate section in your theme options panel from your PC.
Note: You can get the same code for MailChimp, Aweber, GetResponse etc. And add the form as you did for FeedBurner.
As, sidebar is a theme feature, which is basically a vertical column provided by a theme for displaying information other than the main content of the web page. Also, theme is a group of stylesheets and templates that are used to describe the appearance and display of a WordPress site.
A WordPress theme changes the layout & design of your site. Where, Templates are those files which control how your WordPress site will be displayed on the Web. However, if you are not comfortable with the illustrated method. Then there is the method to do the same with the help of the plugin.
Also, plugin is defined as a type of software that contains a group of functions that can be added to a WordPress website. They are used to provide additional functionality to your application.
2. Add Email Subscription with Plugin
Performing this with the help of a plugin, you need to install the WordPress plugin named MailChimp for WordPress by ibericode.
After that, navigate to the plugin settings page. And enter your MailChimp API Key from your working PC. however, in addition to that, you can also customize other options.
Now, follow the steps illustrated below. And you will be able to perform the very job:
- The very first thing, you need to do is Install and activate the MailChimp WordPress plugin.
- After that, type your MailChimp API key in the General Settings tab from your PC.
- Now, move to the comment form integration settings tab.
- Thereafter, enable comment form integration.
- Let’s choose the mailchipper list. Somehow, which means your email subscriber list.
- However, modify checkbox level text. Which means “Sign me up” for the weekly newsletter from your Working window.
- At the last, save all the changes. And finally, you are all set!
Now, Go to any post where comments are active. As a result, you will see a checkbox for the email subscription.
CONCLUSION
Here, in this blog, we have discussed How to Add Email Subscription Option in WordPress Comments?
Often we concluded its layout, its definition, why do we add that, and the process of the very job. Performing this we came across the two methods which are as follows:
1: Add Email Subscription Manually.
2: Add Email Subscription with Plugin.
They do add value to any blog post. And, this leads to the end of the blog.
We hope this blog helped you. However, if you found the blog useful, do not forget to use the comment section provided below. Also, share the blog with your peers. You are on your way to getting more exposure.
If you want fast professional service for WordPress Migration then talk to our Experts as they will help you promptly. Our Toll-Free number +1-888-738-0846 is available for you 24/7.