
Most users use Adobe Lightroom to edit photos before uploading them to WordPress. Since editing the photos is important and manually uploading them to WordPress can be a time drain. So, in this post, we will explain to you how to upload photos from Adobe Lightroom to WordPress.
Adobe Lightroom vs Adobe Photoshop
Here, we’ll break down the characteristics of both software-which solution is best for you.
While both the software do share numerous similarities and both are broadly used by the photographic community, and also they are quite different in some major ways.
Adobe Lightroom
Adobe Lightroom (formally adobe photoshop lightroom) is a group of image association and image manipulation software developed by Adobe System for Windows, MacOs, iOS, and Android. It permits the users to organizing, viewing, and editing the number of digital images. It is worth noting that the lightroom’s edit images are non-destructive.
In spite of sharing its name with adobe photoshop, it can’t perform many photoshop functions, for example, doctoring (adding, removing or changing the presence of individual images items), rendering text or 3D objects on pictures, or altering individual videos frames. It also provides the same results in various form factor. Unlike Photoshop workflow, Lightroom provides all in one solution for editing, organizing and publishing your images.
The core of Lightroom is a list. Basically, an index is a brain behind the operation. This is where all your photos and their related information are saved. You can create folders, archives, and other file directories within your catalog to organize your work, just look exactly how you see fit. The UI (user interface) of Lightroom comprises different “modules.” Each module serves as an unmistakable process in the post-production process, and it also works to make a consistent workflow from import to export.
For instance, the Library module inside Lightroom is the place you compose and sort via your photos and videos. Here, you can see the metadata, include new metadata, rate the pictures, and get a glimpse of the pictures you have in your Lightroom index.
The Develop module within Lightroom is the place you’ll probably spend most of your time. This module is effectively a more hardy version of Adobe Camera Raw. You can adjust presentation, sharpening, white balance, lens distortion, and pretty much anything imaginable, with both JPEG and RAW photos.
Adobe Photoshop
Adobe Photoshop is the highest quality level in the world of photo editing, used by beginners and experts alike around the world. It has made considerable progress since its establishment in the early ’90s. Lately, it has turned out to be more helpful than ever for photographers, because of the expansion of Adobe Bridge and Adobe Camera Raw.
Together, Adobe Photoshop, Adobe Bridge, and Adobe Camera Raw offer the similar experience to Adobe Lightroom, albeit more compartmentalized.
Adobe Bridge is the place your photography work process would start. After importing images from memory card, adobe bridge is the place you can browse the pictures in the folders you have sorted out them in.
Moreover, it shows the detailed metadata information captured with photos and even makes thumbnails for each image. Thusly, Adobe Bridge speeds up the browsing process through your folders, especially if you shoot photographs in the RAW formats.
Adobe Camera Raw is another essential part of the Photoshop work process. Unlike JPEGS, which you can open directly in Photoshop, RAW images will initially be opened up in Adobe Camera Raw, before they are opened in Photoshop. Over the years, Adobe Camera Raw has turned out to be more able than ever. Nowadays, it includes features once saved for Photoshop, like adjustment layers and Adobe’s Magic Healing Brush apparatus.
The benefits of utilizing Adobe Photoshop, Adobe Bridge, and Adobe Camera Raw together as a post-production work process lies in the ability to make the procedure as basic as wanted. If you don’t do a number of heavy edits, Adobe Bridge and Adobe Camera Raw may be all you need for most pictures, and such a solution is far less resource-intensive on your PC than Lightroom, which is known to be a memory hog.
The disadvantages of such a workflow are the powerlessness to do all that you require inside a solitary program. Often, you use the photoshop in the event that time you could have three unique solutions open together to edit a single photo.
Requirements for uploading photos from Adobe Lightroom to WordPress
First, you have to install Adobe Lightroom on your computer. We recommend to use Lightroom Free Trial to test the program before a subscription. Here, we will use the Envira Gallery. It is the best gallery plugin in WordPress. It permits you to build your responsive image gallery in WordPress.
Recently, Envira Gallery announced the Lightroom Addon. Since it is available with their Platinum and Gold license. And, this Addon offers seamless integration between Adobe Lightroom and WordPress website.
Steps to upload photos:
Step 1. Setting Up Adobe Lightroom
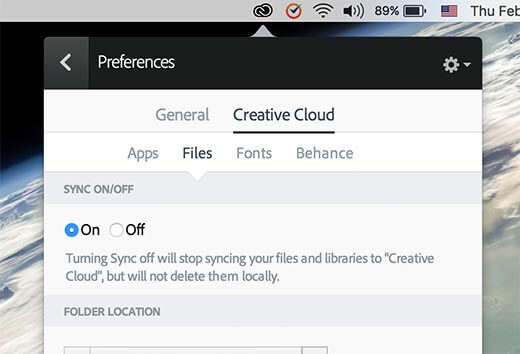
- You have to install and set up Adobe creative cloud app on your computer.
- After installation, you have to sign in a creative cloud app with your Adobe ID. when you logged in then make sure that file syncing is enabled.
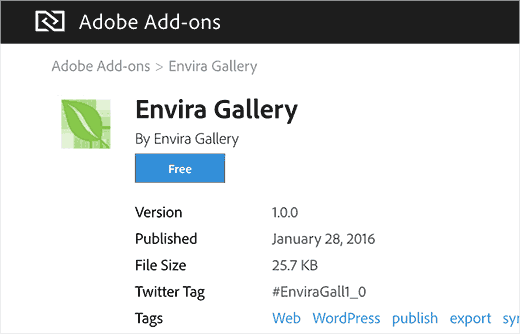
- Now, you have to install Envira Gallery Add-on for Adobe Lightroom. Also, you can do this going to Add-ons Adobe Lightroom page and searching for Envira plugin.
- To open the Addon preview page click on the Envira Gallery and after that click on the Install or Free button to continue.
- After installation, Adobe Creative Cloud app will display you a notification that Envira Gallery addon has been installed successfully.
- The installation will download a zip file which is the Envira-gallery.zip file. So, you need to extract this zip file.
- Now, you should see an enviralrplugin.zip file in your computer’s download folder. Extract this file and find Envira.lrplugin file.
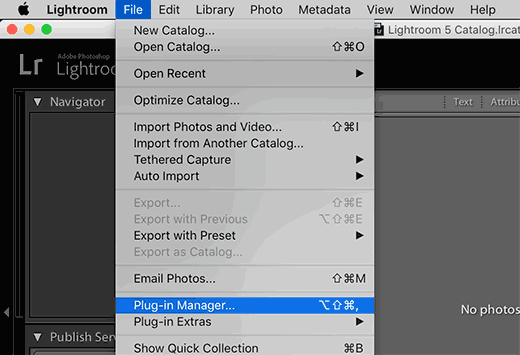
- You have to open the Adobe Lightroom and click on the File>>Plugin Manager in the toolbar.
- You will see a plugin manager window. Now, click on the Add button and choose the Envira.lrplugin file from your computer.
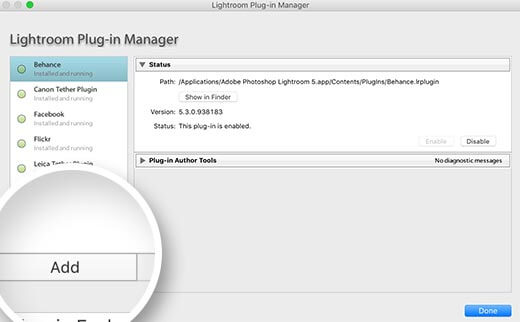
- Click on the Done button to close the plugin manager window. Now, you should see Envira Gallery in the Adobe Lightroom under publishing service.
- You have added Envira Gallery as a publish service to Adobe Lightroom. Now, you have to set up Envira Gallery to work with Adobe Lightroom.
Step 2: Setting up Envira Gallery plugin
- Since Envira Gallery plugin is a premium WordPress plugin. However, Adobe Lightroom has Gold and Platinum plans.
- You need to install and activate the Envira Gallery plugin. If you are beginners, read our guide on how to install a plugin in WordPress.
- After activation, you need to go to Envira Gallery >> Settings page. Thereafter enter your license key. You can get this license key on the Envira Gallery website on your account page.
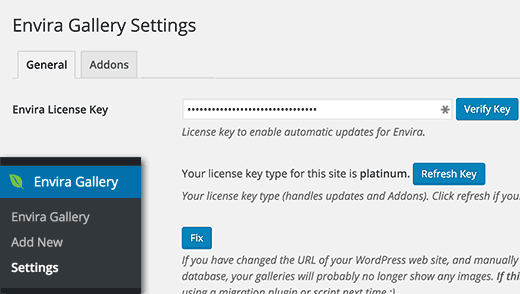
- When you verifying the license key then you need to click on the Addon tab and scroll down to find the Lightroom addon and just click on the Install addon button.
- Envira Gallery will install it and now, you need to click on the activate button to enable it.

- Reload the setting page and you will see Lightroom tab.
- Just click on Lightroom tab. You will see two options.
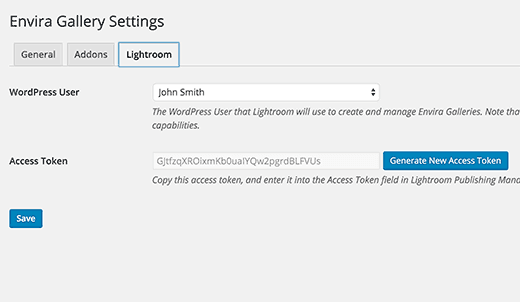
- In the first option, you need to select the user account which you want to use for publishing photos from Lightroom.
- And in the second option, you need to generate an access token.
- You will need this access token in the next step. So, copy this access token.
- Click on the Save button to store your settings.
Step 3: Connect Lightroom to Envira Gallery on WordPress Website
- Since we have set up both Envira Gallery and Lightroom. So, the next step is to permit Lightroom to speak with Envira Gallery on your WordPress website.
- You have to open the Adobe Lightroom and click on the Setup link next to the Envira Gallery under the publish service panel.

- This will bring the publishing service manager window. You have to enter the address of your WordPress site and the access token which you generated earlier.
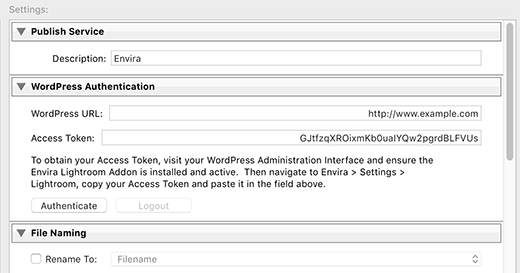
- After you completed, click on the authenticate button.
- Now, Lightroom connects to your WordPress website. When it will connect successfully then you will see a successful message.
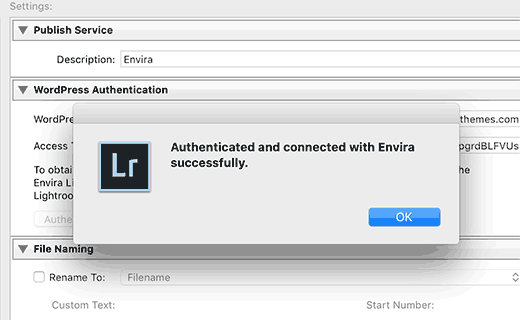
- Now, click on the OK button on the message and click on the Save button in the publishing service manager window.
Step 4: Upload Photos From Lightroom to WordPress
- All the above steps were to set up Lightroom and Envira Gallery. And, you don’t have the requirement to repeat these steps in the future.
- Now, you can easily upload photos from Lightroom to WordPress with Envira Gallery.
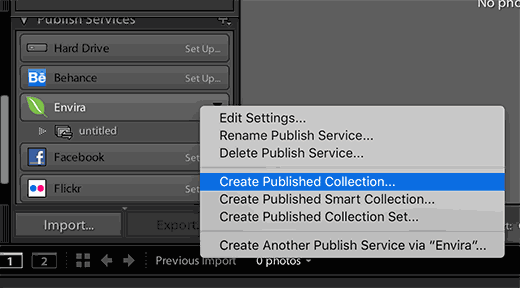
- Go to the Adobe Lightroom and right-click on the Envira under the Publish Service Panel.
- Click on the Create Published Collection option from the menu.
- It will bring a popup window. Here, you need to enter a name for your collection. Also, this name will become your image gallery name in your WordPress website.
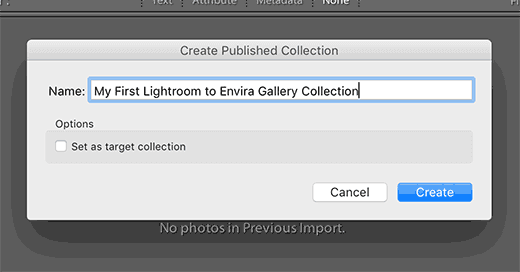
- When you have entered the name then click on the create button to continue.
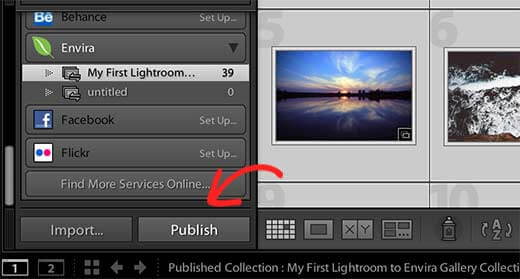
- Now, Lightroom will create an empty collection for you. In this collection, you can drag and drop images.
- When you add, edit, or remove images in a collection then you will see a Publish button.
- Hence, click on it will upload images to WordPress and save them in your Envira Gallery.
- You can edit, remove, make changes etc.
- Click on the Publish button. However, your Envira Gallery will update because addon keeps Lightroom synchronized with WordPress.
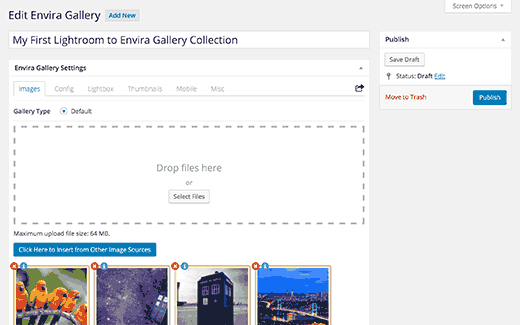
- Now, you can go to your WordPress admin area and then go to Envira Gallery to view the Lightroom collection added as a gallery.
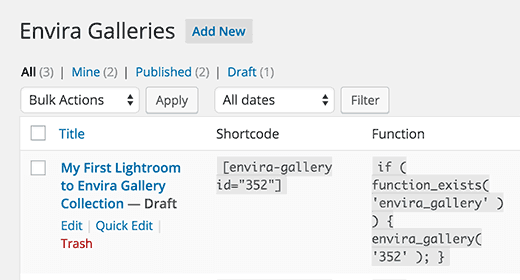
- This Gallery will save as draft. Hence, you can add it in your posts, pages and you have to publish it.
Thus, you can successfully upload photos from Adobe Lightroom to WordPress.
Bottomline
Finally, hoping that this post will help you to understand: how to upload photos directly from adobe lightroom to WordPress. For more help on any other issues talk to our WordPress Support team to get instant advice & support, Dial +1-888-738-0846 (Toll-Free)to avail our WP Security services.
Read More Blogs: