
When it comes to photos, showcasing them efficiently is a focal point of your WordPress website. You need to make sure that all your hard work is protected. That’s why with the right methods, you can protect your original images, photographs, and artwork by effectively adding a watermark in your WordPress Site images.
Many photographers and artists use a watermark to prevent online thieves. Fortunately, WordPress offers you many watermark plugins to make your mark on content and ensure that no-one has the chance to steal your work.
Here, we’re going to explain to you how to automatically add watermark to images in WordPress. There are several plugins which we elaborate here and will help you for the same.
Methods to automatically add watermark to photos in WordPress
Manually add watermark to images in WordPress
You can use an easy watermark plugin to apply the watermark manually.
- First, you need to go to the Settings>>Easy Watermark.
- Next, you can visit the Media>>Library. Here, you will require to check the checkbox related to images you want to watermark. And also, switch to the list view to view Add watermark option.
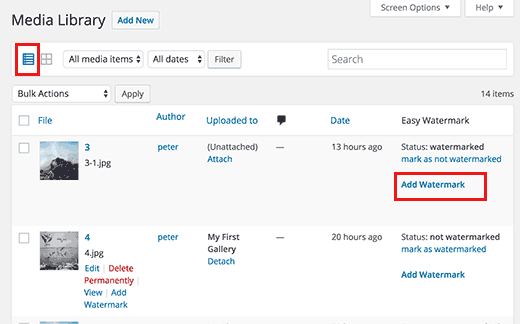
- Now, click on the Add Watermark button of that particular image that you want to watermark from the drop-down menu. Thereafter, click the “Apply” button.
That’s All! Now you have successfully added Watermark to images in WordPress site.
Adding Watermark to Photos in WordPress Using Envira Gallery
- Envira Gallery is one of the best WordPress Gallery plugins on the market. This allows you to create beautiful and mobile-friendly image galleries on your WordPress site.
- However, Envira Gallery plugin always comes with a watermarking add-on which makes it easy to add watermark to your WordPress images.
- First, you have to install the Envira Gallery plugin and then activate it. To know more information, read our article how to install a plugin in WordPress.
- After activated the plugin, you have to go to the Envira Gallery>>Settings page to enter your license key.
- You can receive this key from your account dashboard on the Envira Gallery site.
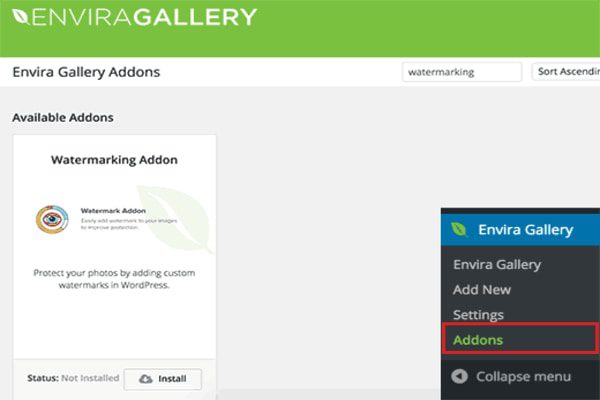
- When your license key is verified, then you can visit the Envira Gallery>>Add-ons page. To find Watermarking Add-on, scroll down or search for it, and then install and activate it.
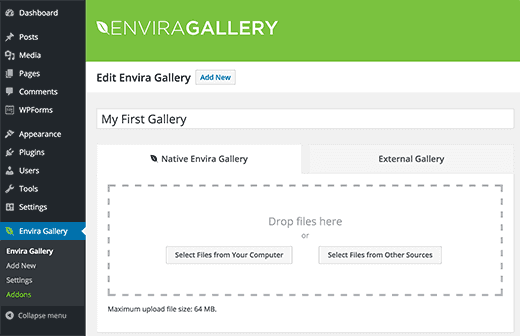
- Now you are ready to add your photos in the responsive galleries with the watermark. Just head over the Envira Gallery>>Add New to create your first image gallery.
- However, scroll down the page and you will see the Watermarking tab. By clicking on it will show you the settings for watermarking.
- You will have to click the checkbox that is next to ‘enabled’ to see more options.
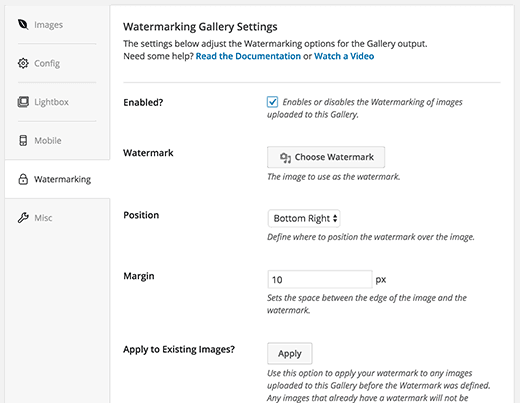
- Next, press the ‘Choose Watermark’ button and upload an image that you want to use as a watermark. Also, you can change the position and margin of the watermark image.
- After adding a watermark image, now you can proceed to add images to this gallery. Scroll up, and then click the ‘Select files from computer’ or ‘Select files from other sources’ button.
- After adding some images to your gallery, you can publish it.
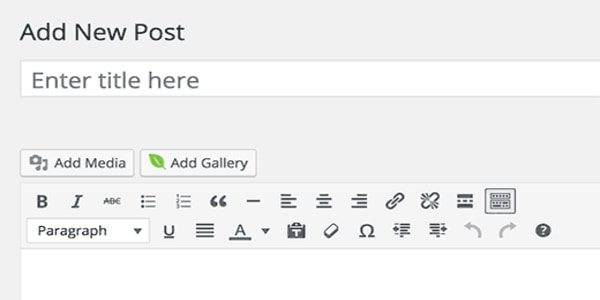
- Now you can add this image gallery to any WordPress page or post. Just edit a page or post, and then press the ‘Add Gallery’ button.
- By clicking on the button will bring up a popup where you have to choose the image gallery you just created and after that press the insert button.
- You will see the Envira gallery shortcode appear in the post editor. Now you can save or publish your page/post.
- Go to your site to view the watermarked image gallery in action.

Add watermark to your WordPress images using Easy Watermark Plugin
- The very first, you have to install the Easy Watermark plugin and then activate it.
- After activated the plugin, you have to visit Settings>>Easy Watermark page to configure the settings of the plugin.
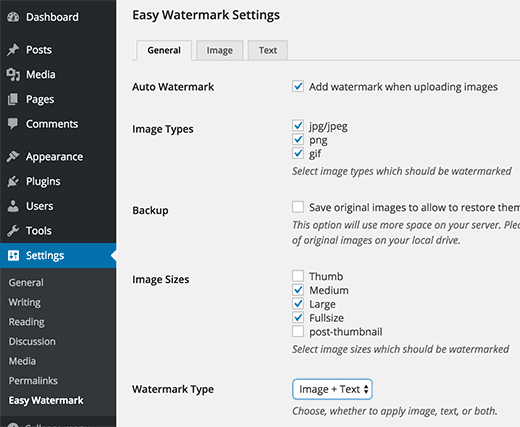
However, the settings page is divided into three tabs:
- The first tab is general, wherein the first option you can add watermark automatically. Also, you can select which image file types to auto watermark.
- The second option is back up, you should check this if you also wish to save original uploads on your server. Also, you can choose which image sizes to add watermark.
- You also require choosing a watermark type. This plugin permits you to add images, text, or both to be used as a watermark.
- Review the remaining options on the page, and then press the Save Changes button to store your settings.
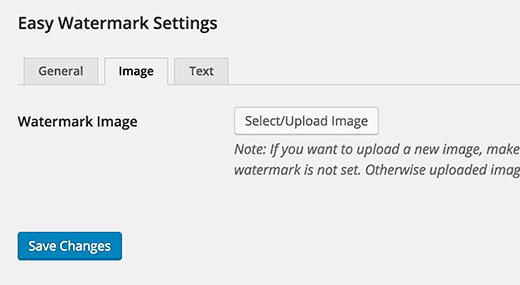
- Now you can click the image tab on the settings page of the plugin. This is where you can upload the image you want to use as a watermark.
- If you have selected image+text or just the text as your watermark type, you need to click the Text tab that is text.
- Here you can add text that you want to display as a watermark. Also, you can choose the font, font size, transparency, watermark, alignment, and color.
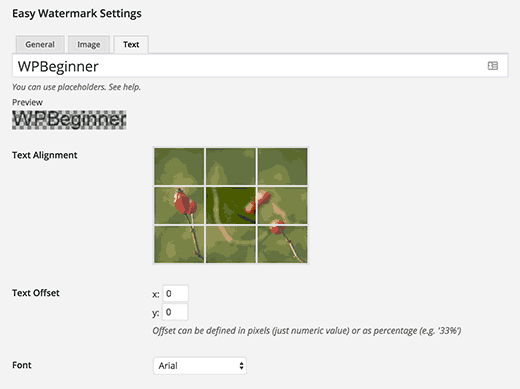
- Press the save changes button to store your settings.
- Now you can add watermarks to images that you add to your WordPress site.
Add watermark to your old photos in WordPress through Easy Watermark
- To add watermark on the old photos, you require to head to the Media>>Easy Watermark and then press the start button under the Bulk Watermark section.

Important: Remember that this process is irreversible. We strongly urge you to back up your WordPress site specifically your Media Upload directory.
- If you have chosen an option to keep a backup of your original upload. Then you can also use the restore option on this page, which will remove the watermark from all images.
Adding watermark to images using Image Watermark plugin
- Like the other watermarks which we have discussed, you need to install and activate the Image Watermark plugin.
- Now go to the plugin’s settings, where you can select enable automatic watermarking or manual watermark button for your media.
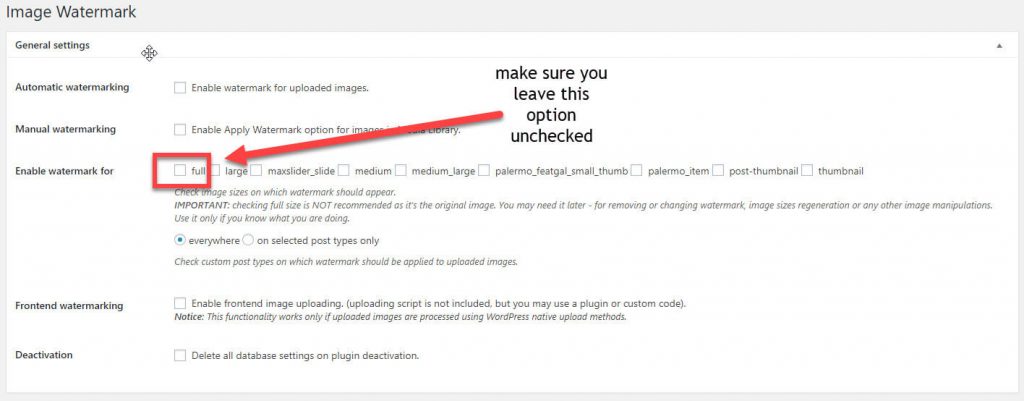
- You can select the image size and position of the watermark.

- You should also keep checking manually the size of images otherwise the watermark might not appear in some of them.
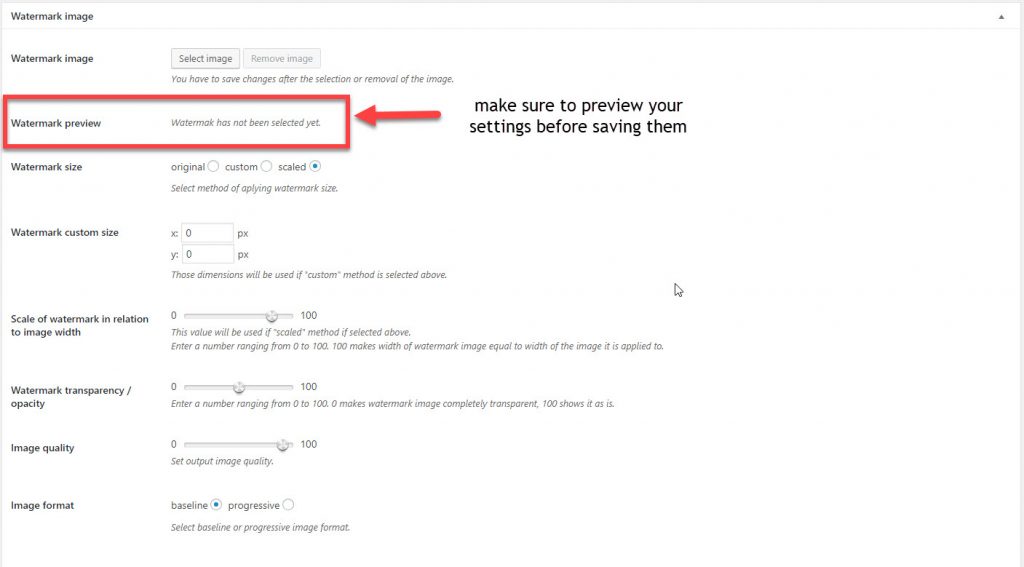
- Go to the plugin’s main setting to add and style your watermark. Here, you can choose your desired watermark image.
- You should make sure to preview your settings before saving them.
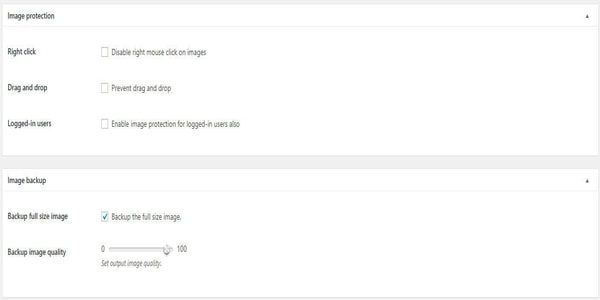
- Furthermore, for image protection and backup settings, you can disable the right-click feature.
Some other WordPress Watermark images plugins
- Signature Watermark
- Scissors and Watermark
- WordPress photo seller plugin
- Sell media watermark extension
Summing Up
We hope this post helped you to add watermark automatically in your WordPress Website. A watermark is also used in many areas to protect the online identity and it is turning out to be a useful practice to embed theme in many WordPress blogs to secure and identify images, etc;
If you have any problem or question regarding the topic, tell us in the comment section provided below. If you liked this post, please share it with your peers.
You can contact our WordPress support team. Dial our WordPress helpline number +1-888-738-0846 (Toll-Free). Our WordPress customer service will always help you.
Thanks!
Read more blogs: