Have you ever desired to create Sticky Floating Footer Bar in WordPress? We have been using the Floating footer Bar on our site for many years. Because it helps us to reduce bounce rate and increase the pages viewed by users.
A lot of you have asked us how to create a similar floating bar, so here it is. In today’s post, we will illustrate to you how to create a sticky floating footer bar in WordPress.
What is Floating Footer Bar?
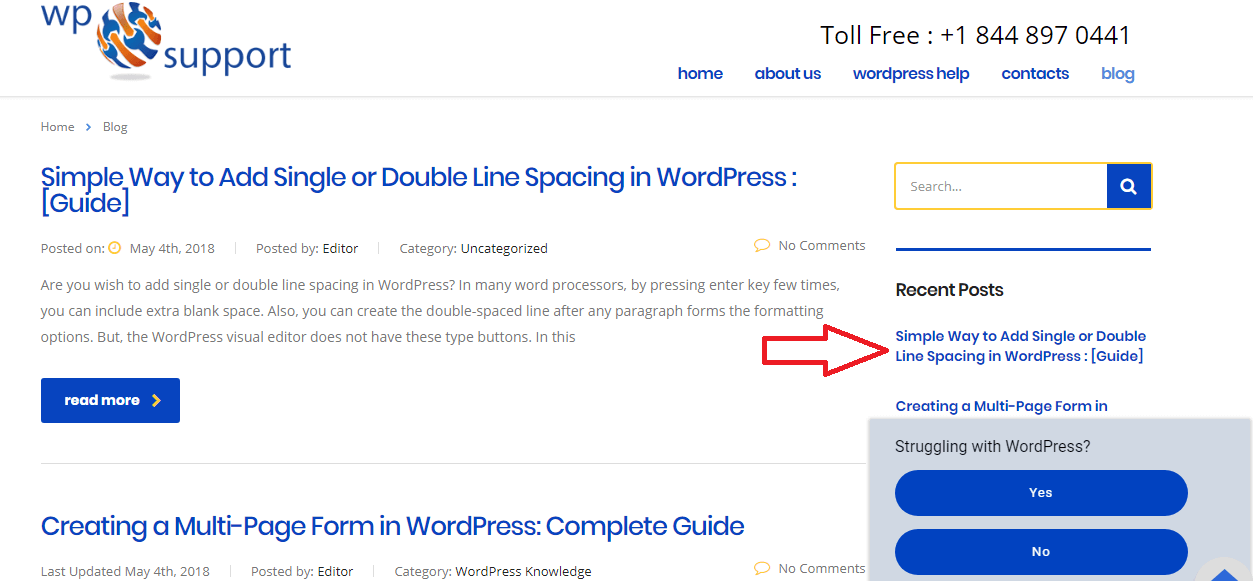
A Sticky Floating Footer Bar permits you to show your important content to users. This bar remains appears to users all the time. So they are more likely to click on it and find more useful content.
You can use a floating footer bar in the following:
- Build your email list
- Drive more clicks to other blog posts
- Bring attention to special offers/sale
Here, in this post, we are going to show you two different methods to add a sticky floating footer bar to your site through navigation menu.
The first one is by using a plugin and the second one is that we are using on wpglobalsupport. You can choose one of them that you find easier to use.
How to Create “Sticky” Floating Footer Bar in WordPress
Method 1: Manually Create Sticky Floating Footer Bar in WordPress
For this method, you need to add code to your WordPress files. If you are new to adding code, then see our guide on how to paste snippets from the web into WordPress.
First, you need to connect your WordPress website by using an FTP client or file manager in cPanel.
In your FTP client, you have to locate the footer.php in your WordPress theme folder. And will have to download it to your desktop. It will be located on a path like this:
| /wp-content/themes/your-theme-folder/ |
After this, you need to open the footer.php file in a plain text editor like Notepad and add the following code before the </body> tag.
| <div class=”fixedbar”> <div class=”boxfloat”><ul id=”tips”> <li><a href=”http://www.wpbeginner.com/”>WPBeginner Link is the First Item</a></li> <li><a href=”http://www.wordpress.org/”>WordPress.org is the Second Item</a></li> </ul></div> </div> |
You can add a lot of list items as you like, we will show you how to randomly rotate them on each page load.
The next step is to add CSS styles.
You can add CSS to a style.css file of your WordPress theme or you can use a simple custom CSS plugin.
| /*wpglobalsupport Footer Bar*/
.fixedbar { #tips, #tips li { |
After adding CSS, you cannot be able to view the changes on your site. Because we have not set the display for any item in our list to none.
After that, we will use jQuery to display an item randomly from our list on each page load.
You require to open a plain text editor like Notepad on your computer and add this code to a blank file:
| (function($) { this.randomtip = function(){ var length = $(“#tips li”).length; var ran = Math.floor(Math.random()*length) + 1; $(“#tips li:nth-child(” + ran + “)”).show(); };$(document).ready(function(){ randomtip(); }); })( jQuery ); |
After adding the code, you have to save this file as floatingbar.js on your desktop.
Next, open your FTP client and then connect to your web server. And go to your theme folder and search the js folder.
It will be on a path like this:
| /wp-content/themes/your-theme-folder/js |
In case there is no js folder in your theme directory, then you have to make one.
Now you have to upload the floatingbar.js file that you created earlier for the js folder.
The next step is to enqueue (load) the javascript file to your WordPress theme.
Here is a guide on how to add a javascript file.
Paste this code into the functions.php of your theme file or site-specific plugin.
| function wpb_floating_bar() { wp_enqueue_script( ‘wpb-footerbar’, get_stylesheet_directory_uri() . ‘/js/floatingbar.js’, array( ‘jquery’ ) ); } add_action( ‘wp_enqueue_scripts’, ‘wpb_floating_bar’ ); |
That’s all!
Now you can go to your website to see the floating footer bar in action. Reload the page twice to see the footer bar randomly displaying different items from your list.
The advantage of using this method is that you will get many links randomly in the floating footer bar as we are doing.
However, the difficulty is that you need to add the code. Also, you cannot use this floating bar for other things without doing too much CSS optimization.
Method 2: To Add Floating Footer Bar in WordPress By Using OptinMontser
The OptinMonster plugin is the most popular lead generation plugin. It works on all websites and helps you to convert website visitors into customers and subscribers.
Floating footer and header bar are one of the OptinMonster features., that you can use to show an email optin form and to promote a single links/offer.
The advantages of using this:
- Easy to Setup (no code required)
- You can show custom floating bars on different pages and categories of your site.
- You can use it to create your email list as well as promote offers.
- The only downside is that OptinMonster is a premium service.
After you have purchased OptinMonster (Pro or plus plan), you can use the OptinMonster WordPress API plugin on your website. For more details, see our guide How to Install a Plugin in WordPress.
However, these plugins only serve as the connector between your WordPress site and OptinMonster.
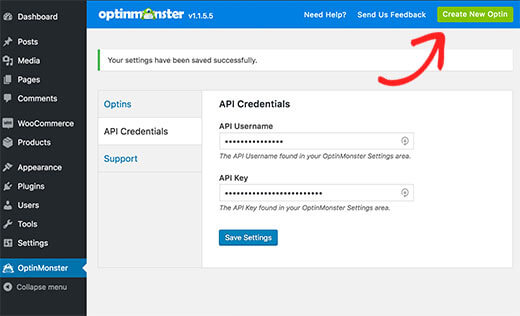
After activation, the OptinMonster plugin will add a new menu item labeled OptinMonster in your WordPress Admin Bar.
By clicking on it will take you to a plugin’s settings page.
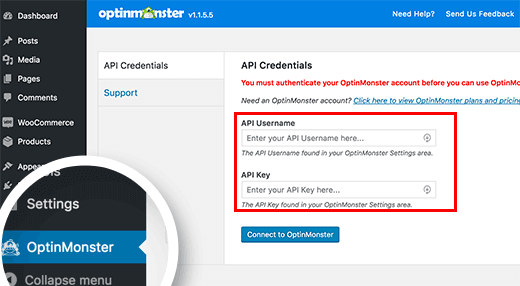
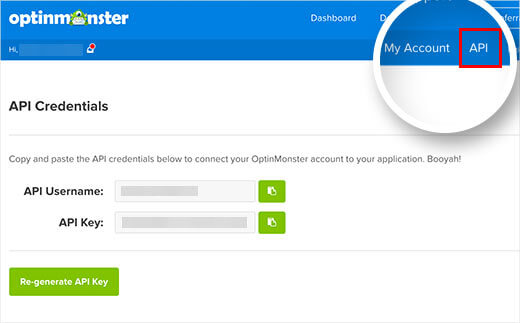
You will be asked to provide your OptinMonster API key and username and you can get these keys from your OptinMonster account.
Now, copy and paste the keys into the settings of the plugin and then press the ‘Connect to OptinMonster’ button.
Now the plugin will associate your WordPress site to your OptinMonster account.
After this, you have to click the ‘Create New Optin’ button.
It will take you to the ‘Create a new optin’ page on the OptinMonster site.
First, you have to provide a title for your optin campaign and you have to choose a site where you will be using this optin. In case your website is not listed, then click the ‘Add a new site’ link.
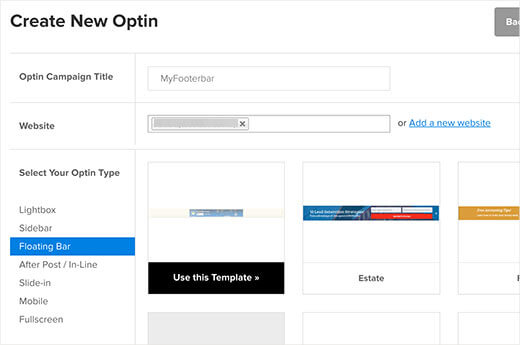
After this, you can click the floating bar under ‘Select your optin type’ to use templates available to use as a floating bar.
You can customize all these templates of your choice. Choose the one that looks closest to what you have in mind.
OptinMonster will launch its design customizer when you select a template.
However, it is a point-and-click builder where you can configure the appearance and settings to your optin.

Once you’ve configured the appearance of your optin, click on the Save button.
Although these are called optins, they do not have to be. You can use the Yes/No feature to view a blog post or to add a button to claim a special discount.
When you create your floating bar for the first time, it is paused by default.
Once you’ve configured it, go to the status bar in the top menu and select Start Campaign. Now your floating bar is ready to be added to your WordPress website.
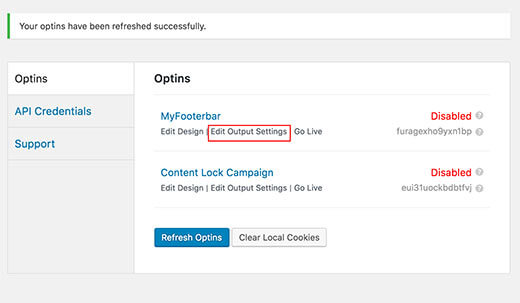
Return to the admin area of your WordPress site and go to OptinMonster>>Optins.
You will see your optin listed here. In case you do not see it, then click the Refresh Optins button and the plugin will display it.
And then click the ‘Edit Output Settings’ link to continue.
On the next page, check the box that is next to the ‘Enable optin on-site’ option, and then click the Save Settings.
Also, you can use advanced options to show the floating bar only on specific pages, posts, categories, and other areas.
Now, Floating Footer bar optin is live on your WordPress website.

Conclusion
A sticky floating footer bar is very useful to let your site visitors view your online content easily. You can highlight a special offer or event on it to get more user likes or views.
We hope these ways helped you to create sticky floating footer bar. If you are facing any problem to creating it, let me know in the comments box! If you liked this post, then please share it with your peers.
You can contact to our WordPress Support team if you need any help related to WordPress, dial +1-888-738-0846(Toll-Free). We will be pleased to help and support you in case of any issues related to WordPress.