
Do you want to install WordPress Locally on your MAC using MAMP? MAMP is an easy-to-install collection of Apache, MySQL, and PHP grouped together for Mac. Using MAMP you can install WordPress on your Mac. In this article, we will show you what actually MAMP is and how to install WordPress Locally on your MAC using MAMP.
Read Also: 4 simple steps to install WordPress
What is MAMP?
It stands for Macintosh, Apache, MySQL, and PHP. MAMP is a free application. You can install on your Mac computer that permits your entry to a local Apache server. Here Apache is a popular open-source, cross-platform web server that is, right now the most popular web server in existence. It is actively maintained by the Apache Software Foundation.
Also, web server is a software which receives your request for accessing a web page. It runs only a couple of security checks on your HTTP request and takes you to the web page.
The four components of MAMP:
- Macintosh: It is an operating system
- Apache: It is an open source web server
- MySQL: most universally available relational database in the world
- PHP: PHP is a server-side scripting language (which WordPress sites run on)
Reasons for Using MAMP:-
MAMP allows you to:
- Establish and design your site locally.
- Build sites you don’t want the world to see (as the search engines can’t index your local site)
- Work in a rapid development environment (because it doesn’t depend on an internet connection and connecting with a web server)
- Work offline and use the local install as a limited backup of your existing site
- Develop sites in a secure environment.
Setting up MAMP on your Mac
Right now MAMP is available in two different versions: one is the premium paid version and other one is a free version. The free version is typically what you’ll need, as it comes with the full suite of web software needed to run most websites.
Once the download is complete, locate the file from your downloads folder – it will be named something like MAMP_MAMP_PRO_3.0.5.pkg (the numbers may be different as they represent the current version number) – and install it just like any other software. Now you have your web server on your laptop. Just learn how to use it.
Starting up and using MAMP
Once this software has been successfully installed you can locate your installed software package in your Applications folder.
- Now you’ll see two new icons on your screen: One for MAMP and another one for MAMP Pro.
- Only MAMP icon is needed for this article while MAMP Pro icon can be ignored or deleted. Double click on MAMP icon to bring up the dashboard widget.
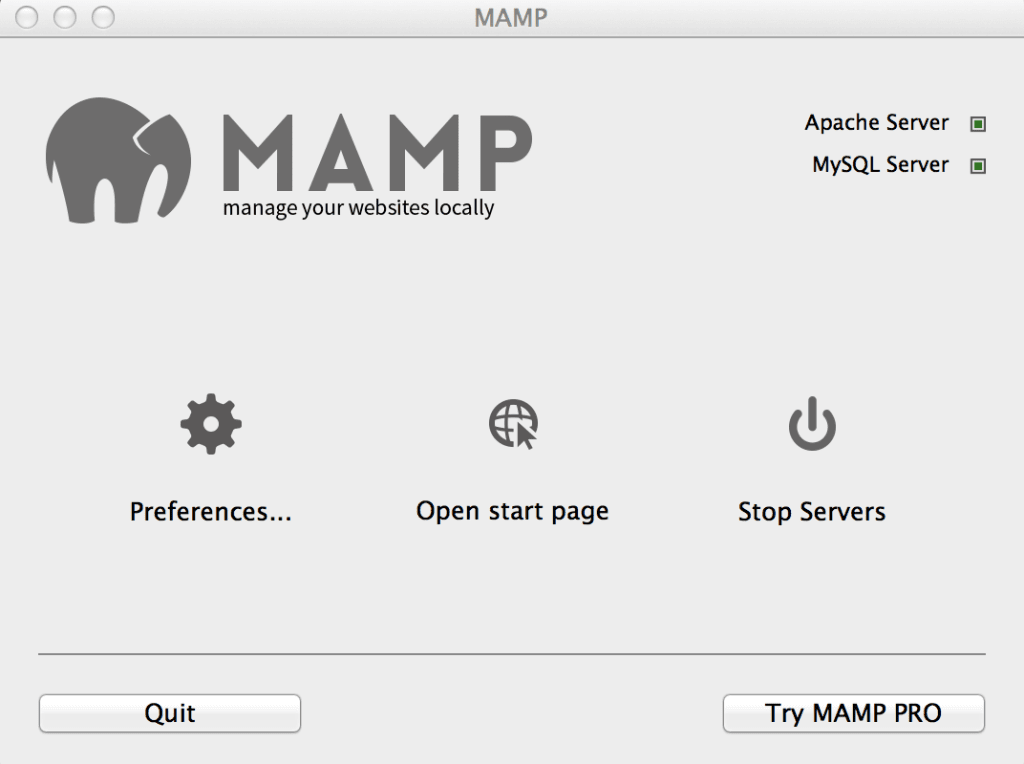
- Few things to point out: Firstly, you can tell when the Apache and MySQL servers are working by looking at the upper right-hand corner.
- There is a green box beside each server indicating which one is up and running as expected. Secondly, you can’t close the widget without shutting down the servers, so just minimize the window to get it off your screen.
- If needed you can also go through the setting located under the preferences button on the widget, but MAMP works quite smoothly so it is recommended you shouldn’t make any changes.
- The next thing you need to do is to get to the start page by clicking on the button Open Start Page.
Here, widgets allows you to add content and features to your sidebar without writing any code. This is the best way to add things like quotes, popular posts, galleries, facebook like boxes, and much more to your WordPress sidebar.
As, sidebar is a theme feature, which is basically a vertical column provided by a theme for displaying information other than the main content of the web page. Where, theme is a group of stylesheets and templates that are used to describe the appearance and display of a WordPress site.
Also, templates are those files which control how your WordPress site will be displayed on the web. These files draw information from your WordPress MySQL database and generate the HTML code which is then sent to the web browser.
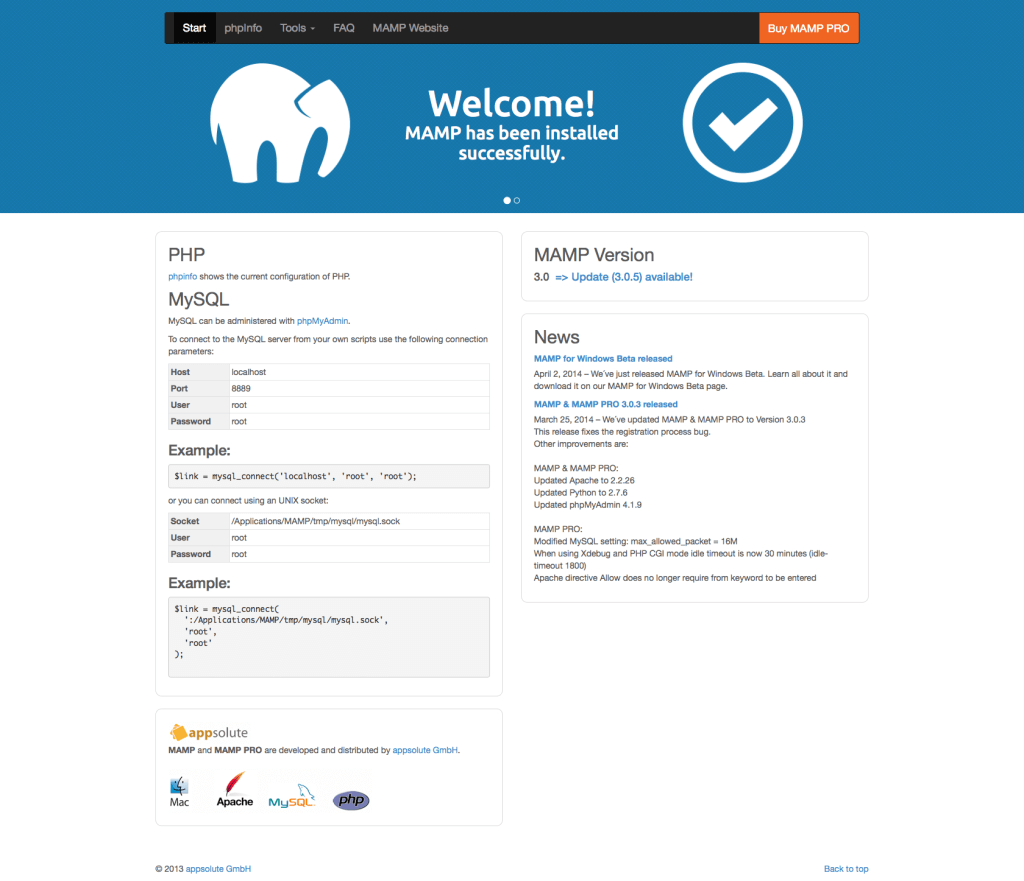
This page contains basic information on MAMP and its different components. Use the phpMyAdmin feature under the Tools menu – for the most of the time.
Using phpMyAdmin
phpMyAdmin is used here to establish, manage and work with MySQL databases. It’s a very powerful tool once you learn how to use it. As MySQL as an open source database management system to store and retrieve all of the website’s information, everywhere from the content of the posts and pages to the comments, usernames, and passwords of your website.
Where, the articles posted by the admin of a WordPress site are called posts and pages are like posts. Pages can be managed in a hierarchical structure in WordPress.
Now we will go through How to set up a database and a user so you can install and run WordPress on your local machine (your laptop or desktop). For this you’ll need to do two things:
- Create a Database, and
- Create a user that has privileges on that database.
Let’s start with creating a database, which is a simple process.
- Firstly Click on the database tab now you’ll see a Create Database Field where you have to give name to your database and then click on Create button.
- Secondly, we have to create a user that has privileges to access and work with the new database. For this, click on the Users tab in phpMyAdmin and then find the link to Add User.
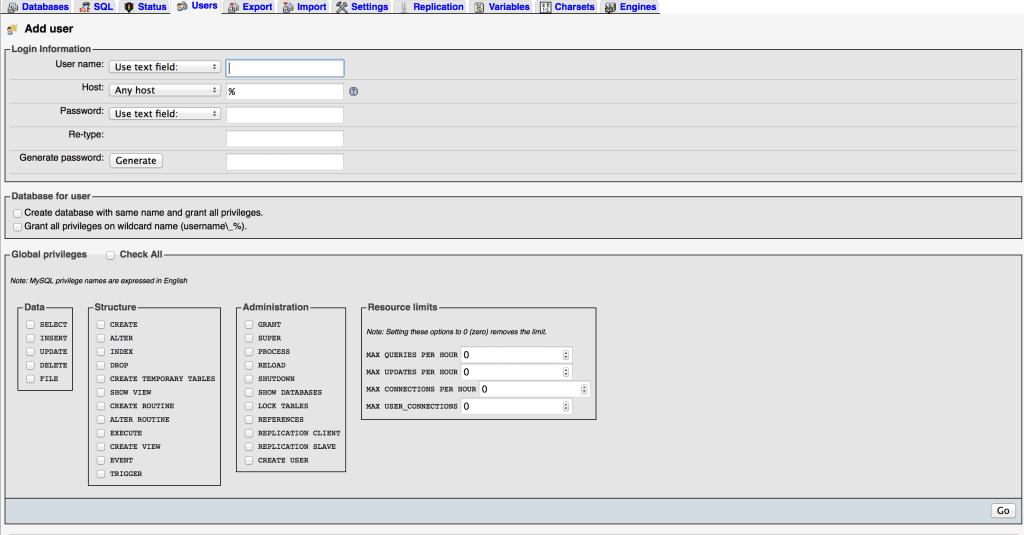
- Now enter the required details such as a username, host type and password. This will set up a user for the database, but we still need to configure the privileges this user has.
- You can determine which individual privileges to check off in the Global Privileges section – or you can simply select the Check All box and grant global permission to the user.
Now that we have a database and a user who can access it, it’s time to get a WordPress website up and running.
Installing WordPress
Steps for Installing WordPress
Create a new folder in the htdocs directory of MAMP installation. This is where all of your sites will live. The name of this folder will turn into your site name for step three below.
- Copy and paste all of the files from the WordPress folder into the one you’ve set up for your site.
- Open any browser you want, navigate to localhost:8888/yoursitename/wp-login.php and run over the (less than) 5-minute-long installation process.
- You now have a fully useful WordPress site to work on.
Wrapping Up
So, the MAMP helps in a great way in installing the WordPress Locally on your MAC. We hope that the above article helped you in installing the WordPress Locally on your MAC using MAMP.
Still facing problem related to installing the WordPress Locally you can also talk to our WordPress Technical Support Team, Dial +1-888-738-0846 (Toll-Free). We will help you to solve all your difficulties related to WordPress.