When it comes to pushing notification, you probably think about the notices you received on your smartphone every time. Push notifications are also known as web push notifications and used on popular sites like Facebook, etc; However, many of us are familiar with push notification and have to face at least once.
Whenever the push notification is used in the browser then they are known as a web push notification. Furthermore, web push notifications can be delivered to the desktop users, Mozilla Firefox users, Google chrome (android version), and Safari on OS X users, but not be delivered to iPhone or iPad users.
Push Notifications are also delivered to those users who are not using the browser when the notification is sent. In this case, notification is stored for the next time. Whenever the user opens the browser, at the same time the notification is delivered.
More so adding the WordPress web push notifications is not a daunting task, its very simple to add. Hence keep reading this guide here we will explain to you why and how to add web push notifications in the WordPress site. Let’s have a look:
Why do we add Web Push Notifications in WordPress site?
As we have discussed above, Web push notifications are clickable messages that are displayed at the top of the user’s desktop. They can be shown even when the user’s browser is not open.
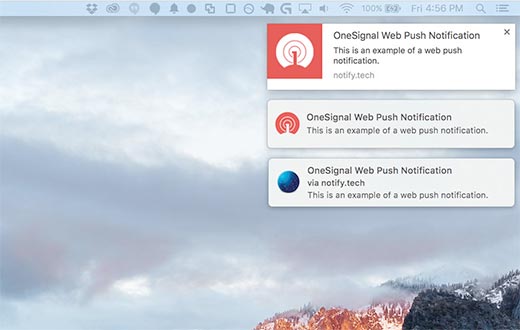
Apart from desktops, web push notifications work on mobile browsers.
Although, popular websites like LinkedIn, Pinterest, Facebook, etc. are already using web push notifications. However, this is proving to be more appealing than SMS, email marketing, and other social media. According to a survey, push notifications have a 50% open rate on mobile devices.
This means that a more engaged audience for your WordPress website and a significant increase in your overall page views and returning to visitors.
Add WordPress Web Push Notifications with OneSignal Plugin
When you publish a new post, the OneSignal Web Push Notification plugin will automatically send a notification to all subscribers on your WordPress site.
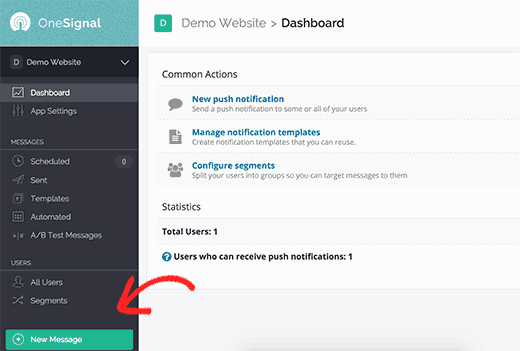
From your OneSignal app dashboard, you can also manually send notifications. Log in to your OneSignal account and click your app name.
From your left menu, press the ‘New Message’ button.
Furthermore, it will bring you to a new message screen. You can enter a title and some content for your notification. Also, you can press Segments, Options, Schedule/Send Later to further customize your web push notification.
For example, you can link it to a specific page on your website. And send it to a particular segment of your users, or schedule it to be sent at a specific time.
However, OneSignal is a free service that permits you to add push notifications to any site, web, or mobile application.
First, you have to install the OneSignal plugin and then activate it. To know more, read our guide on how to install a plugin in WordPress.
After the installation process, this will add a new menu item labeled OneSignal in the WordPress Admin Bar.
By clicking on it you will go to the plugin’s Settings page.
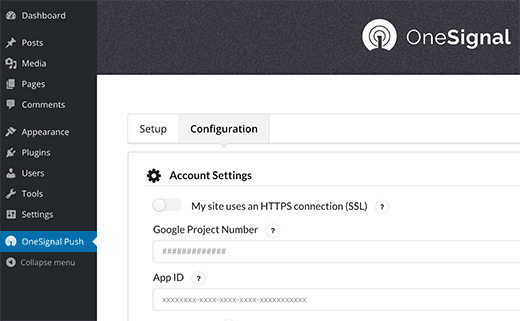
The settings page is broken into Setup and Configuration tabs. The setup tabs actually detailed documentation on how to set up OneSignal push notifications in WordPress. This is the same step that we will show you in this tutorial.
To set up OneSignal, you will have to add different API keys and application IDs in plugin settings.
Step 1: Create Google Keys
First, you have to go to the Google Services Wizard website.
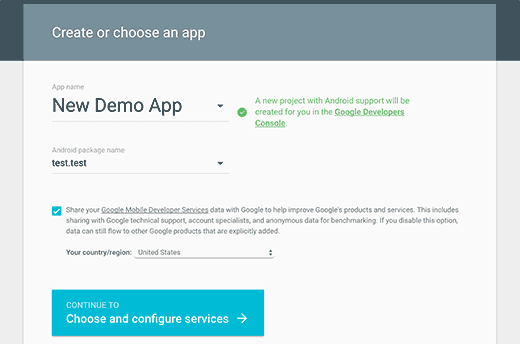
Just provide a name for your app and add an Android package name. OneSignal does not use an Android package name, but it is a required field. After this, select your country and region, then click the ‘Choose and Configure Services’ button.
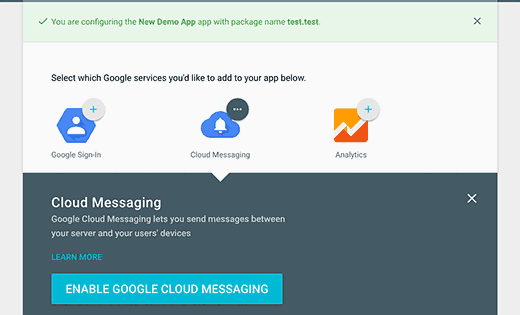
It will bring you to the next screen where you will be asked to choose the Google services that you want to use with your app. You have to click the ‘Enable Google Cloud Messaging’ button.
Now you will see your server API key and sender ID.
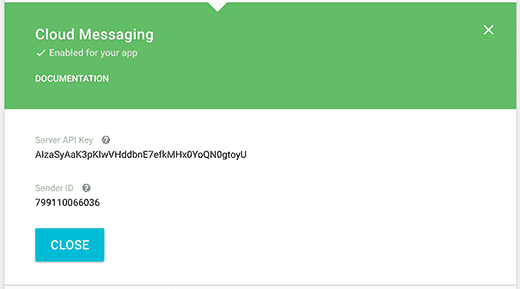
You have to copy your Sender ID and paste it into the WordPress Plugin’s Configuration tab under the Google Project Number field.
Also, you have to copy your server API key and paste it into a text file on your computer. Later in this tutorial, you will need this API key.
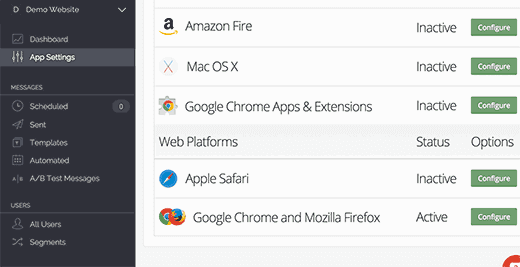
Step 2: Setting up Chrome and Firefox Push Notifications
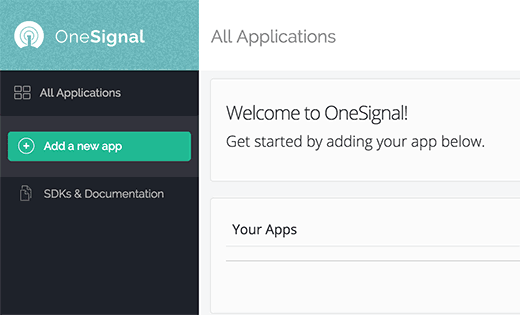
Now we will set up push notifications on Firefox and chrome. First, you have to go to the OneSignal website and then create your free account.
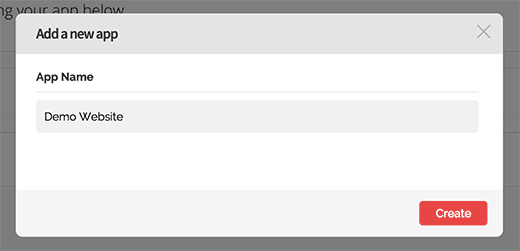
Once you’ve created your account, you have to log in and click on the ‘Add new app’ button.
You will be asked to enter a name for your app. You can use the name that you want and then click the ‘Create’ button to continue.
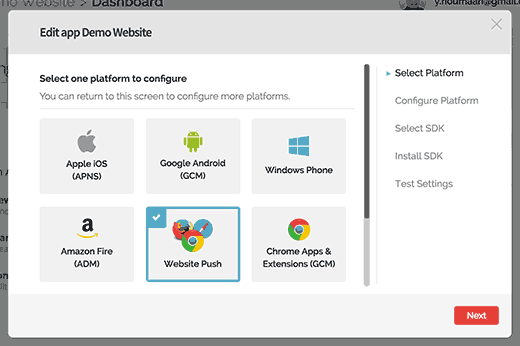
On the next page, you will be asked to choose a platform to configure. You have to choose ‘Website push’ and then click on the next button to continue.
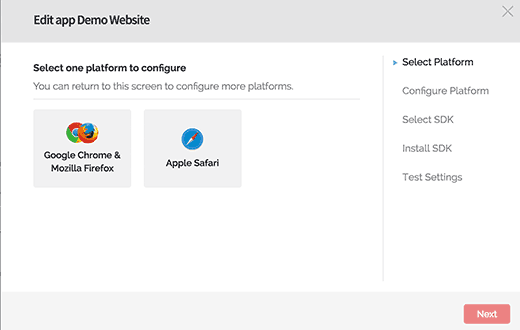
After this, you will be asked to choose a browser platform. You will see Google Chrome and Mozilla Firefox and Safari in a box in another box.
You have to click the Google Chrome and Mozilla Firefox box. We will show you how to set up Safari later in this post.
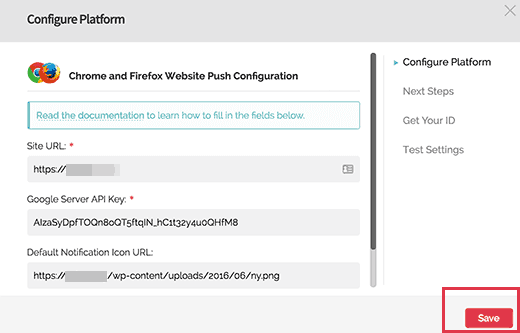
Click the next button to continue. In the next step, you will be asked about entering your website URL. However, the Google server API key and URL for your default notification icon image.
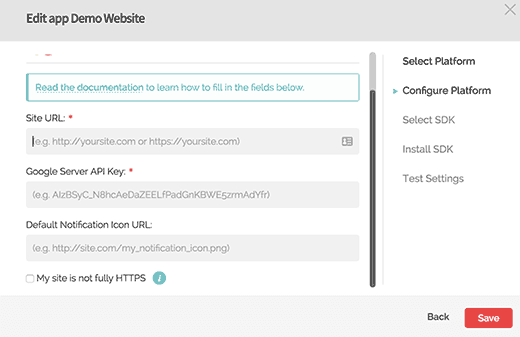
If your site does not support SSL/HTTPS, then you need need to check the box that is next to ‘My Site Fully HTTPS’ option. Also, if you want, you can set up SSL on your website.
However, web push notifications do not support Google chrome for https sites or non-SSL. OneSignal resolves this problem by subscribing to users to subdomains on their own https domains.
Checking the ‘My site is not fully HTTPS’ option will show the HTTP fallback option.
You have to select a subdomain for your app and enter the Google Project Number or Sender ID generated in the first step.
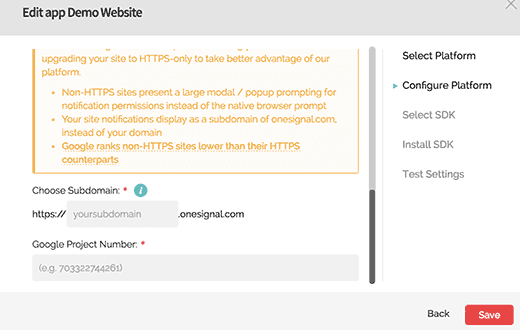
Click the Save button to continue. You can now exit this dialog box. You will be prompted with a notice that your setup has not yet been completed and it can be resumed later. Click Yes to close the dialog box.
Step 3: Getting OneSignal Keys
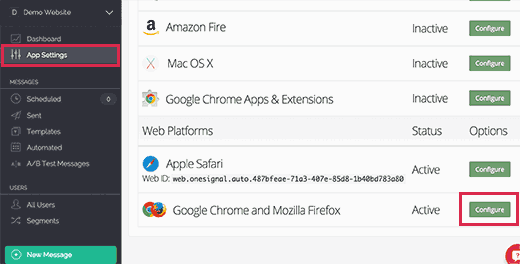
Now you have to get the OneSignal key for your site. Click the app settings from your app dashboard.
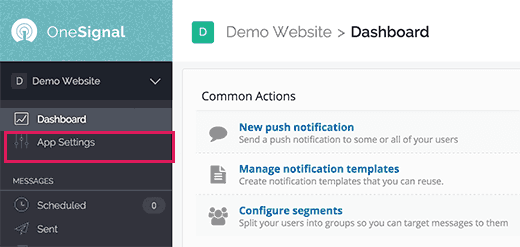
It will take you to your App Settings page. You have to click the key and the IDs tab.
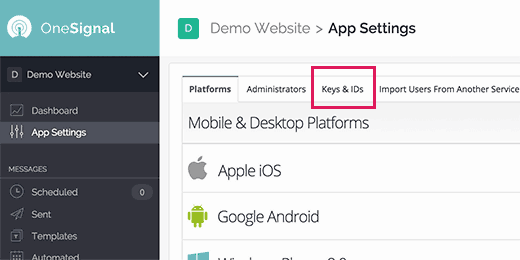
Also, it will display your Rest API key and OneSignal App ID.
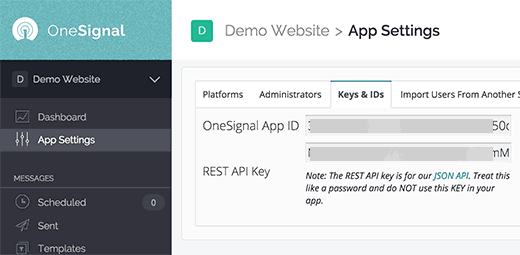
Now you have to copy and paste them into OneSignal WordPress plugin’s configuration tab on your website.
Step 4: Setting up Safari Web Push Notifications
Remember that we have left Safari Web Push Notification Settings. Now we will show you how to set up Safari Web Push Notifications.
Log in to your OneSignal account and go to your App Settings page. Scroll down on the web platform and click the Configure button next to Apple Safari.
Also, it will bring a dialog box where you will be asked to enter your site’s name and site URL.

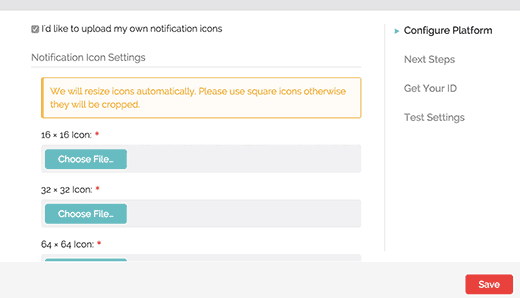
After that, you have to check the box that is next to the ‘I’ d like to upload my own notification icons option.
Now, you will see the option to upload different icon sizes. These are square images, use Photoshop or any image editing program to create icons inaccurate shape.
Click the choose the file button to upload all your icons.
Click the Save button and then close the dialog box. Refresh the App Settings page and scroll down to the web platform section. This time you will see ‘Web ID’ under Apple Safari.
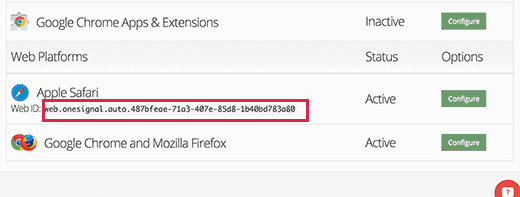
You have to copy this web ID and paste it into the OneSignal plugin’s configuration tab on your site.
Now you have successfully set up OneSignal Web Push Notifications for your WordPress site. But the question is – how to test it?
Step 5: Testing Web Push Notifications on Your WordPress Site
By default, this OneSignal plugin will add a subscription icon to your WordPress website. To do this, go to your site in the supported browser and then click the Subscribe button.
You will see the default ‘Thank you for subscribing’ message. Now login to the OneSignal account. Click on your app name and app settings.
Scroll down to the Web Platform section. And press the Configure button that is next to Google Chrome and Firefox.
You will see the platform configuration screen that you previously filled out. Just click the save button and then click on Continue.
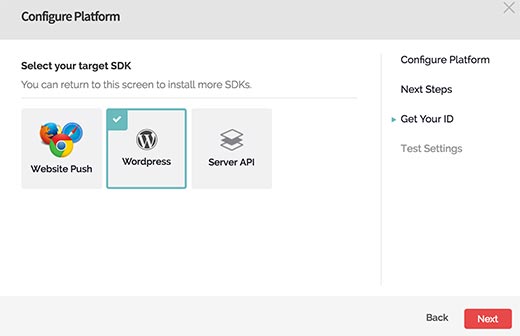
Also, you will be asked to choose the target SDK. You need to choose WordPress and then click the next button.
Since only you have one subscriber at the time of your subscriber ID will be automatically filled.
Press the next button, and you’ll reach the ‘Test Settings’ step. Now, click the ‘Send Test Notification’ button.
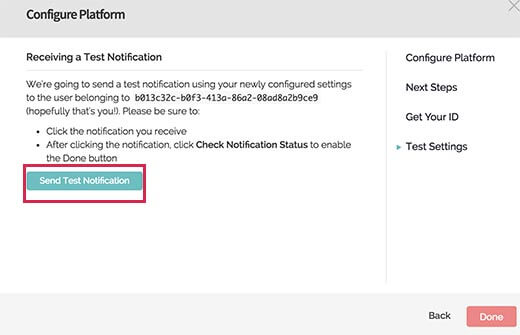
Now One Signal will send a web push notification.
However, the appearance of the notification may vary depending on the browser that you used to subscribe to. you have to click on it when a notification appears on your computer screen.
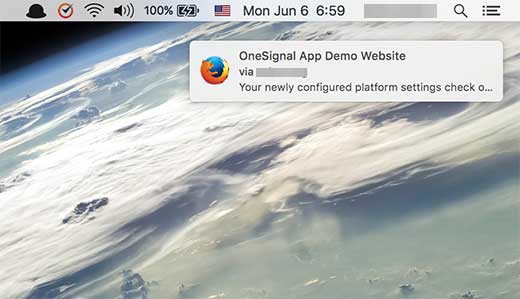
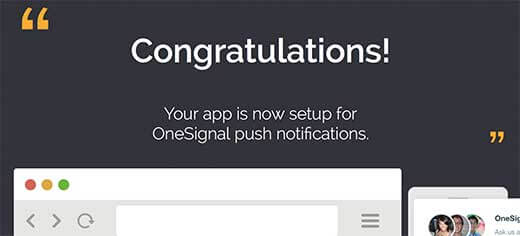
Although this will take you to the confirmation screen, indicating that you have successfully set up OneSignal Web Push notifications for your website.
Thereafter, return to the configure screen on the OneSignal site and click the ‘Check notification status’ button.
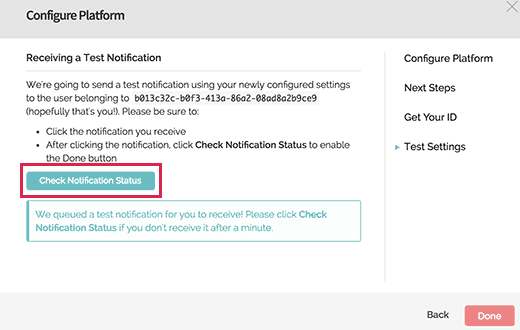
Now you will see another success message that indicates you have successfully added web push notifications to your WordPress website.
More WordPress plugins in 2021 to add web push notifications
Not only this WordPress also has too many plugins that allow you to add the web push notifications in the WordPress site. Each & every plugin has its own distinct features and also easy to use.
1. Pushed
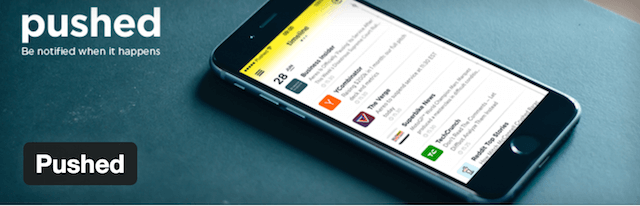
‘Pushed’ is an independent Web Push Notification service. That allows you to create your own developer app to add push notifications to your WordPress Website. However, in turn, the WordPress plugin makes it much easier for you to enable it for you and provide the facility on your WordPress blog. Pushed is a very good plugin to use.
Well, it makes it easy for those who develop it. Thus, all you really have to do is create a new app using the Pushed platform and simply request to create an app that you can then send to your website visitors with a QR code.
It works for Desktop, iOS, and Android. However, it is the best plugin for Web Push Notifications. Which you can use without any hesitation.
2. Proximi.io
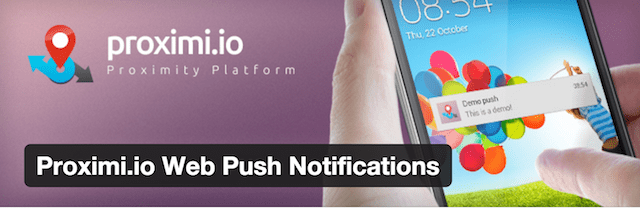
If you think branding is impossible on Web Push Notifications? Then you are completely wrong. With the Proximi.io plugin, you can add your blog logo at the top of the notifications.
Proximi works for Android and Google Chrome (mobile and desktop). As well as Safari (desktop version only). And it allows WordPress bloggers to send push-notifications based on geographic data. So that you can use location-based analytics data.
Often, the other features are it includes the option to set your own company’s logo. For each push notification that you send to it. In addition, you can divide your subscribers on the basis of their location or any other data. And can collect the analytics as well.
3. PushAssist
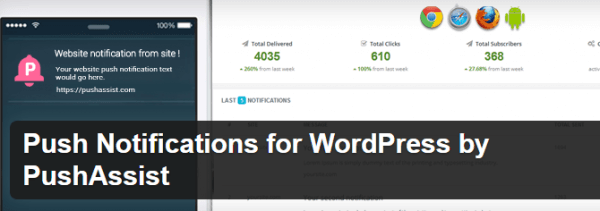
Unlike the first I shared, you can send notifications to Safari, Chrome, and Firefox with this one. One of the nifty features it has is the live preview. However, you can see how the notification appears will it moves live.
There are many effective templates you can choose. And, delay display options are another useful option which it provides to your site. However, you can PushAssist for free up to 3000 subscribers in all.
4. Roost Web Push
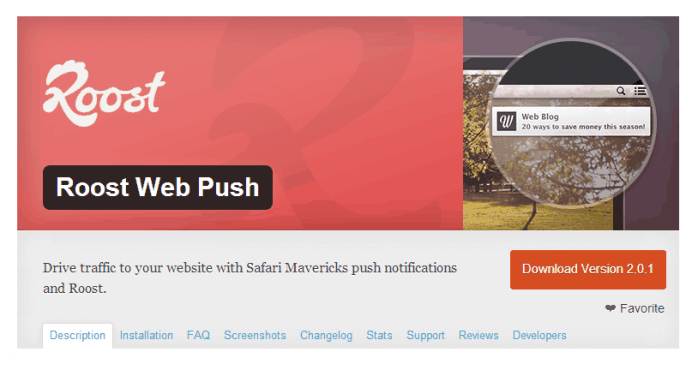
The best thing about Roost Web Push is that it can send notifications to Chrome Android. Yes, you heard that right. With Chrome for Desktop, Firefox and Safari, this will send your notice/notification to users who have Chrome for Android.
However, you may use it for free! Automation allows you to send notifications on publishing new posts. Or while updating existing ones from your PC. however, the analytic feature provides you with accurate information while scheduling helps you send notifications over time.
5. PushCrew
If you want comprehensive coverage, not only for your WordPress site. However, you can select PushCrew because it is not exclusive to WordPress only. Similarly, as of OneSignal, it covers Chrome (both desktop and Android), Safari and Firefox. Unlike any other plugin in this list, PushCrew allows you to customize messages in any way.
But they do not have an automation feature in them. However, as long as there are fewer than 500 customers. You can use this plugin. It has RSS support, CTA button, Scheduling, Segment Creator, and much more.
6. Pushengage
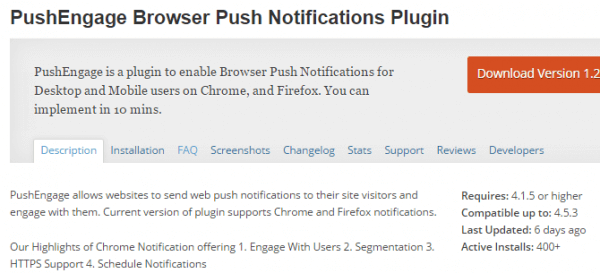
PushEngage is technically a standalone service for mobile and web push notifications. Thus, it offers a dedicated WordPress plugin. That easily adds push notification functionality to WordPress.
However, it lets you send push notifications. To both desktop and mobile versions as follows:
- Firefox.
- Chrome.
- Samsung Internet Browser.
It is completely free for up to 2,500 customers. And 120 notifications per month. It is just to manage the extra numbers in excess. However, you will need to pay, starting at $25/month.
7. Delite Studio

When you publish a new post. It sends push notifications to iOS, Android and Fire OS devices directly from your WordPress site. However, warn your visitors in real-time, when new content is published. And lets them transform into regular and faithful readers.
Somehow, I will not recommend this plugin for a long time use on your WordPress site. But it’s reliable for the short-term period.
8. Push Monkey
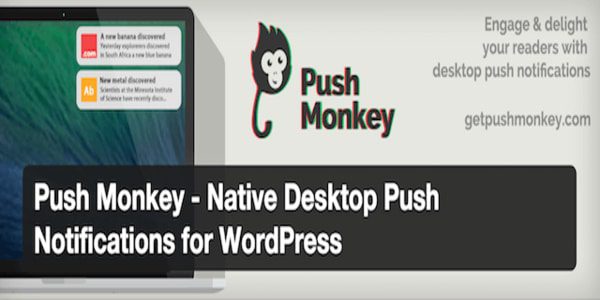
Push Monkey plugin is designed to send push notifications directly to your visitor’s desktop. However, many of the modern browsers today enable their users to send desktop notifications via a simple notification sign up model.
Somehow, which asks each visitor whether they want to sign up directly for notifications. When new information is published. However, you will definitely be able to find some visitors who will see your content as soon as possible, as they get the notifications.
9. Push Notifications for WordPress (Lite)
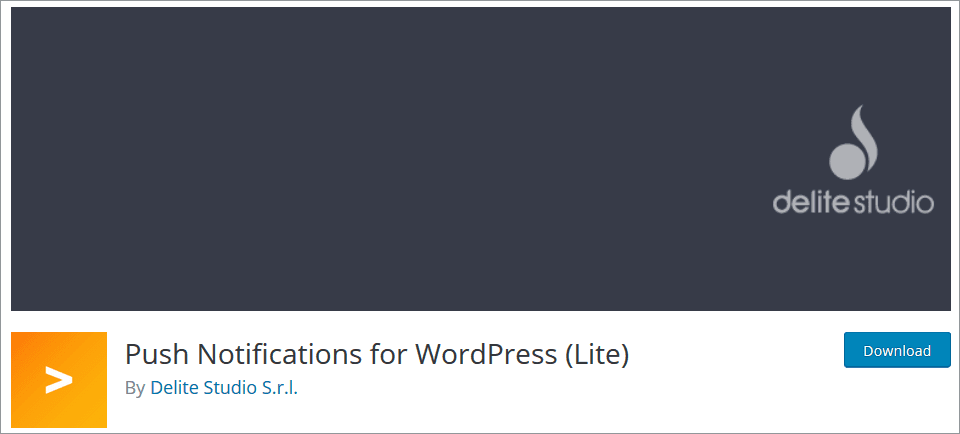
Push notifications for WordPress (Light) allow you to focus on making beautiful and unique apps. Without developing your server-side back-end from your PC.
The content of the app is automatically collected from your WordPress Website. So there is no additional work required to maintain them. However, it is completely free and is downloaded 1000+ times. It has a rating of 3.8 and has no subscriber limit.
10. iZooto

iZooto is a simple WordPress plugin that helps you to convert your user into web notification subscribers. The web push notification helps you to build your own subscriber list faster than Emails.
after installing this plugin you are able to send a personalized notification to bloggers, marketers, and developers even when they are not on your site. It can be a boost to your website traffic. iZooto supports Chrome and Firefox in both desktop and Android.
However, the only disadvantage is it not support iOS.
11. Pushprime
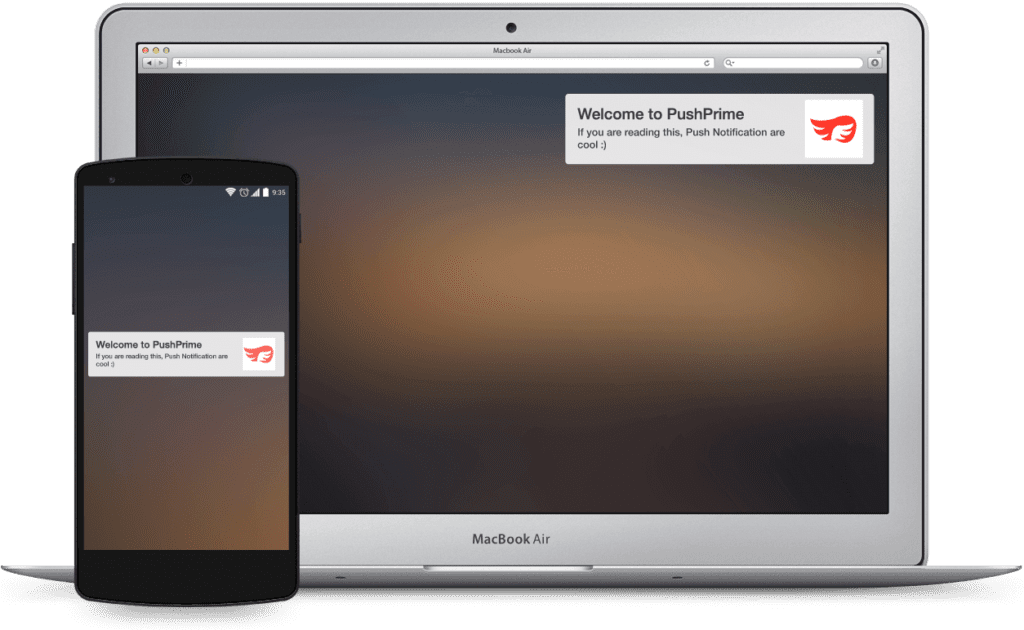
Pushprime is comparatively better than iZooto. It supports maximum software. Like Firefox, Chrome, Safari, Android, iOS, Opera, WordPress, Joomla, Magento. That’s why it derive more traffic. And with minimal coding, you can easily integrate the plugin in your site.
The Advancement in feature increases its popularity. Pushprime allows schedule and recurring notification and this also works as a reminder for your audience. It enables you to send a welcome notification to your new users. It also gives an option of geographical and lingual targeting.
Pushprime also provides real-time analytics, customization, and theme for multiple websites.
12. Pushify
Pushify allows web push notification to users with browsers like Chrome, Firefox, and Safari. So, it works in the top browser. To activate it first you need to register with Pushify and install this plugin on your website. Once the plugin is installed you will be asked about your visitors for sending push notifications.
The plugin will help you to grow your subscription list and you have quality traffic on your site. The integration process is quite simple. Login to Pushify dashboard, click on setting followed by account menu and copy the Account ID you get. Paste the Account ID to in Pushify menu in your website dashboard and you are done.
13. PushUp
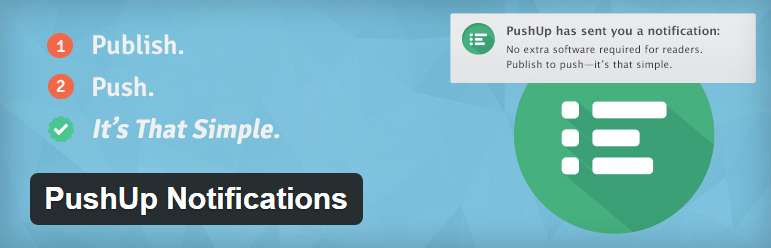
PushUp connects your WordPress site to a premium push notification service. It allows you to selectively deliver the on-demand notification to your readers on any update of your website. Other than this it also allows real-time analysis and Monitor engagement.
Currently, PushUp supports Safari Push Notification on OS X Mavericks. Other updates are still to come for other browsers. So, if you want to setup PushUP in your WordPress website first you need to create an account at pushupnotifications.com.
14. SendPulse Free Web Push

SendPulse Free Web Push serves over 20,000 clients and sends over 150 million web push notifications every month. Web Push Notification is an ideal and instant solution to update your viewers.
The Plugin supports Chrome-Desktop and Android, Safari-Mac OS X, Firefox- Desktop On both HTTP and HTTPS websites. SendPulse will allow you to send a personalized notification, Push messages through a personal account to your viewers. Furthermore, the features of the plugin are real-time analysis and location targeting.
To activate the plugin you need to create an account with SendPlus.
Conclusion
Web Push Notification is a great feature to add to a WordPress website. It is always an advantage to have this feature. Because you stay connected with your viewers even when they are not on your website. And it increases the CTR (Click-through rate) also.
We hope this post helped you to learn how to add Web Push notifications to your WordPress site. If you have any query to attach it, let me know in the comment section below.
Still, if you have any problem just ask our WordPress support team. Dial WordPress help number +1-888-738-0846 (Toll-Free). Our WordPress customer service will always help you.
Read more blogs: