The new WordPress.com has provided some desktop apps that are coming for all operating platforms such as Windows, Mac, and Linux. These apps are based on modern technology that is very fast, safe, and sure to enhance your writing experience.
But are you really getting the profit from the apps if your blog is not powered by WordPress.com? But the best thing is that you may also use self-hosted WordPress blogs.
In this article, we will show you from the installation of the WordPress desktop apps and configure the application to eligible it works with your self-hosted WordPress blog.
What is WordPress Desktop Apps
Let you inform that, the company of WordPress.com has developed the desktop versions of the WordPress app when it released the new WordPress desktop app just before few months. In the beginning, this WordPress app was launched only for Mac. And it has slowly come into the Windows and Linux versions of the app.
The new WordPress desktop apps architecture is designed by JavaScript and the WP REST API. The desktop apps come with the same technology and add to the fever of the WordPress publishers.
The downloading and installation of WordPress application is very simple. So let’s go to the official website of WordPress apps – Desktop.WordPress.com and download the app according to your operating system.
Installing and Configuring WordPress Desktop App
- Here, we are showing the figure of the OS 10 version of the application in this post, but most of the steps will be the same on the other platforms(OS).
- First of all download and install the WordPress application.
- After starting the application and you will get a login screen. You have to log in to your account at the WordPress.com.
- On the WordPress.com, firstly you will get the Reader tab. By using this you can read all the newly posted posts on the WordPress sites and tags that you follow the app.
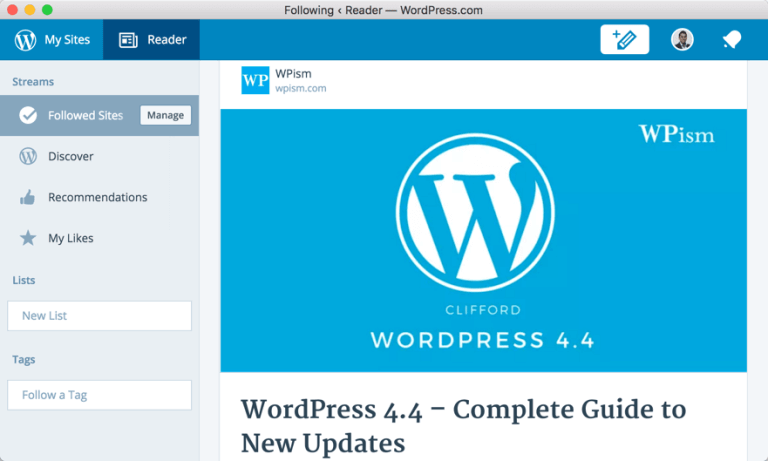
- Then go to My Sites tab which is next to the Reader tab and you will be reached the stats page of your default WordPress website.
- Then click on the Switch Site if you want to handle your other sites.
- Now you had to see your self-hosted WordPress site on the list if you have perfectly followed the above steps.
After downloading of your WordPress application, let’s know some new features. And How it can be used for your WordPress Blogs.
Features of WordPress desktop app
So, once you will install the WordPress.com application and you have to configure your site with it.
Let’s know the features of this app. If you are using the WordPress.com, you should know about the main features of this application. Most of these features are known for the WordPress users, here you can see your website in an easy way and in the updated version of WordPress dashboard. The App is designed into three major sections for several processes.
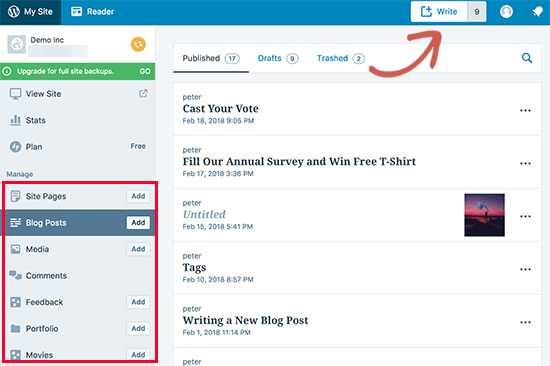
Publish Section
Here you can add pages and post and can publish directly to the WordPress blog form this section. The editor looks clean and up to date.
Even you can check your previous pages and posts on your blog. And also you can be customized by utilizing this section.
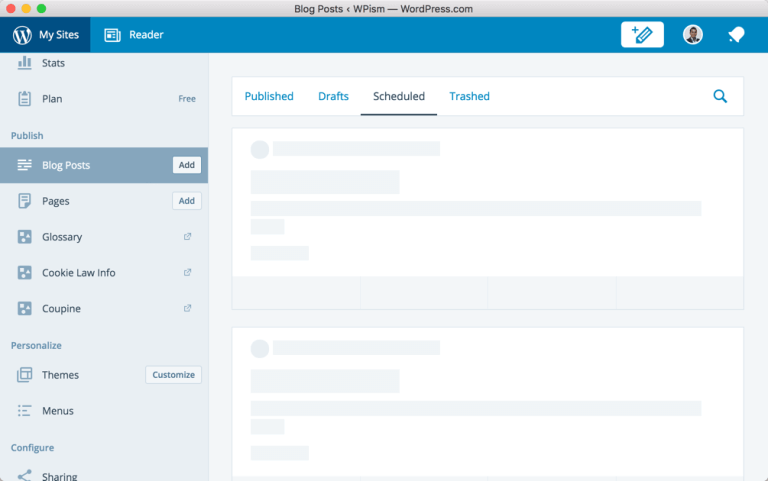
Also, you can see your edited post types at the sidebar, but there’s no choice to edit and publish custom posts directly from the app.
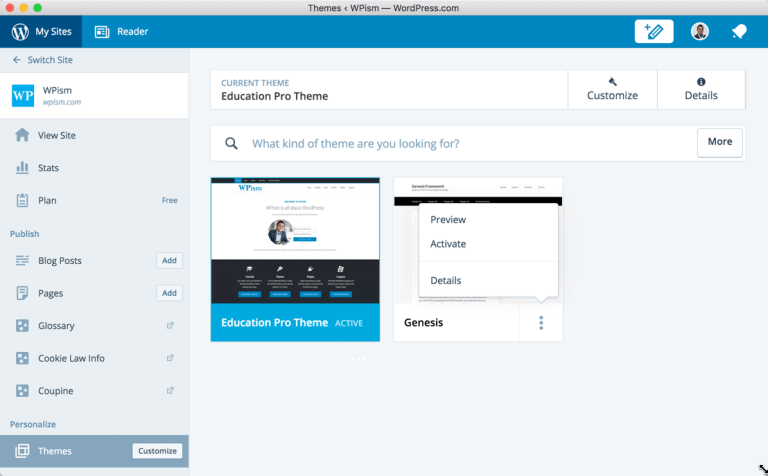
Personalize Section
Through this Personalize section, you can edit your themes and add/edit menus.
For customization of themes you will get some limited choices for authorization of self-hosted WordPress blogs and only you have eligibility to activate other installed themes on your site. You can get an overview from the below screenshot.
By using the Menus tab you can easily attach new menus, customize existing menus, and allocate menus within menu enabled areas on your blog in a simple interface.
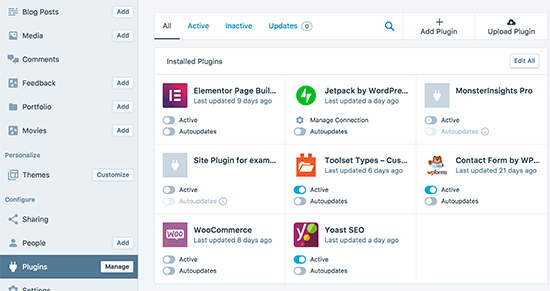
Configuration Section
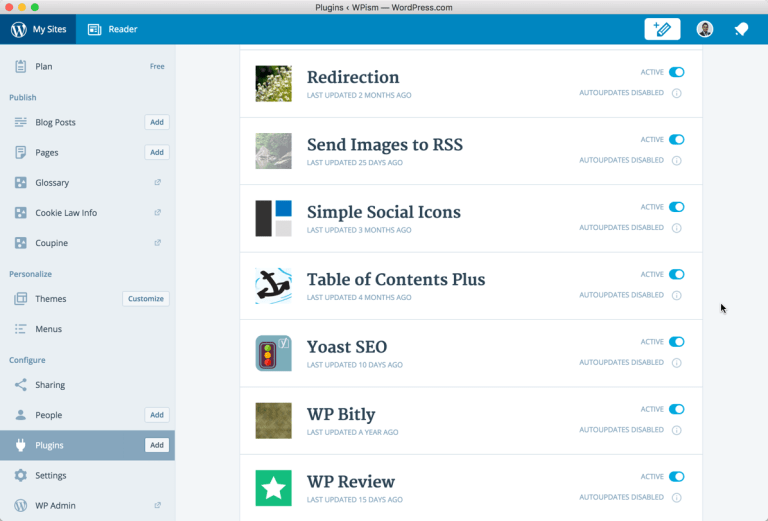
This section will let you configure the setting of your blogs for several visitors, plugins and some other settings. The capability for handle plugins and auto-updates connected with JetPack plugin is one of the main thing for this section and also for the whole app. You can activate or deactivate edit the size of all installed plugins on your site and the whole app by using this section.
After that, the setting screen will help you to configure your main settings for Writing, General, Discussion and security options. You will get the options for setting for buttons and media connections.
Using WordPress desktop apps with self-hosted blog
Step 1: First of all, you have to install it and activate the JetPack plugin on your site. For more details, if you want to see in brief how to install a WordPress plugin then visit our blog.
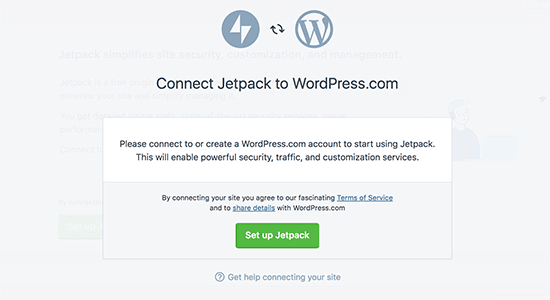
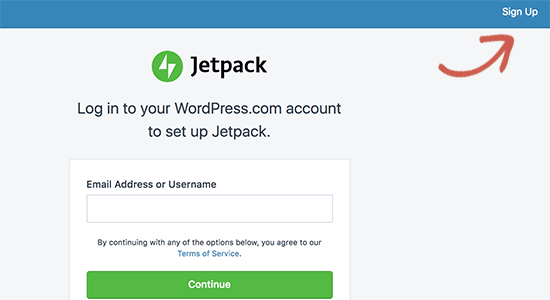
Then you have to click on the “Set up JetPack” button to go forward. It will bring you to the WordPress.com website. If you have a WordPress.com account, they may log in. In other words, you have to go to the signup button to generate a new account.
step 2: After this, you will see a pricing page. So scroll down to the bottom of the page and select the “Start with free” button.
Step 3: Now WordPress.com will generate a free account, and you will be sent to back to your site. And then, you have to download and install the WordPress Desktop App on your desktop.
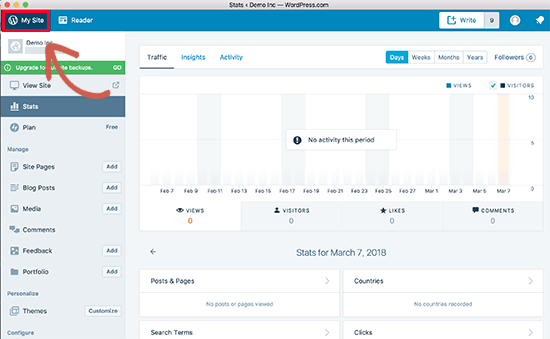
Step 4: After installation lets go forward and start the app. Here you will get the login screen where you have to provide username and password to login to your WordPress.com. Once logged in, you will get the screen of WordPress.com reader where you can enhance your content and follow blogs. And to handle your website, you have to change to the My Sites tab.
Here you will get the title of your site in the left menu bar. On the right side, you can see JetPack traffic reports.
Step 5: By going to the admin bar of the left column, you can customize and generate the pages, posts and custom post types. Here also you can add the new blog post by clicking on the write button at the top.
The content customizing section provides a very enhanced user experience. On the right column, you will get some post settings like status, categories, post scheduling, and featured image, tags, and more. On the left side, you will get the interruption-free writing section with a highly defined text editor.
Step 6: You can attach the pictures and galleries to your post by clicking on the ‘Add’ button on the display of your editor. Now you can close the settings column by selecting the gear icon at the top.
So, in the Comments area, the WordPress desktop app will permit you to control the comments of your site. You can easily give the reply to the comments and as well as allocate or delete comments pending moderation.
Step 7: The themes area of this app will permit you to control themes that are already installed on your site. For that, you can install a new theme.
But, you cannot edit your theme within the app. By going to the customizing you can open the customizer display on your site in a new browser tab. Here the plugin area will permit you all things like install, upload, and activate the plugins from your app.
WordPress app will let you inform about the plugins updates. You can update directly these plugin from the app. You can also select the option to auto-update plugins that you trust.
Step 8: Next, let’s discuss the sharing area. In this section, you can connect with the JetPack plugin to get famous on social media sites and share the posts on social media.
If you have to add the new authors and users with WordPress, then you can do from the ‘People’ area in this app display. It displays all registered users on your site as well as those users who are following your blog using the JetPack follow feature.
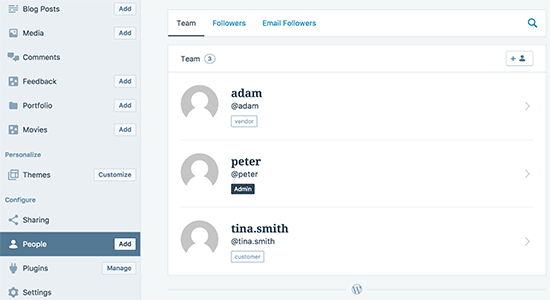
Step 9: Now, for inviting new users you have to go to the add button. And click on previous user accounts to see their information and can delete accounts. The settings area of this app will permit you to control WordPress settings form the WordPress app.
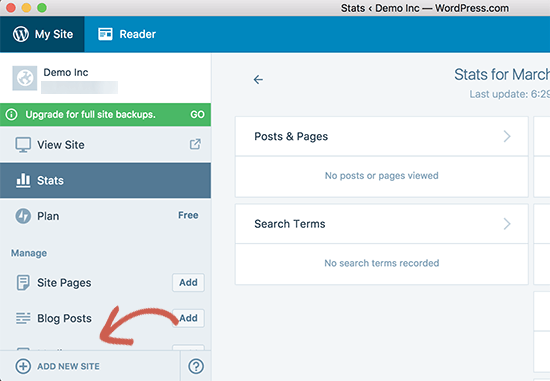
If you are handling more than one WordPress site, then you can attach them to your WordPress app and control all things from the same dashboard.
For adding any other website you should have JetPack installed and combined with the same WordPress.com account that is using the WordPress app. At last, to add a new site button you have to click on add new at the bottom right corner of the app to add other.
Wrapping Up
We hope that this post helped you a lot. With the help of this post, you can add WordPress Desktop app with your self-hosted blog to gain a new & wide experience of blogging with more enhanced features.
If you face any problem while doing this, tell us in the comment section provided below. Also, share the blog with your peers.
We discuss you WordPress Desktop App for your self-hosted blog, that helps you to do this things with your app. In case of any related problem contact to our WordPress tech Support team now to get instant help. Dial +1-888-738-0846(Toll-Free).
Recommended Blogs: