
In this guide, we will show you how to add a directory to any WordPress Website. Adding a directory to your site is the best way to monetize a blog that not many people think of in this day and age.
However directories are still significant and useful to businesses and by using the right WordPress plugin, you can fully automate the process to create a nearly passive income source. Adding a directory to your WordPress site can not only be a monetization method for your blog, but it can also be a good resource for your audience. You can select and choose which listings will provide the most value to your audience, and position yourself as a go-to expert in your niche. In case you already have an existing WordPress blog, it’s simple to add a directory to your website with a simple plugin. Let’s see how:-
If you want fast and best support then talk to our WordPress Customer Service Team, dial +1-888-738-0846(Toll-Free).
All About the Business Directory Plugin
This is a free plugin available from the WordPress directory. The free version lets you add a directory to any website, and there are also premium modules available for adding more functions and features.
Business Directory Plugin is usually updated and it has a 4.7-star rating. Most of the reviews concentrate on the ease of setup and use of the plugin, fast support provided by the developers and the useful tutorials or documentation.
With the free version you can:-
- Enable reCAPTCHA to weed out spam listings
- Using a shortcode add a directory listing to any page
- Create submission forms with fully customizable fields and charge a premium fee for sticky or featured listings
- Authorize submitters to edit their own listings without any access to WordPress dashboard.
Various premium modules let you to:-
- Accept payments using Stripe, Paypal, or other methods
- Set up coupons and discount codes
- Add Google Maps embeds to listings
- Allow users to upload images and to claim existing listings
- Offer various levels of featured listings and Adds 5-star ratings to your listings with rich snippets
How to Use Business Directory Plugin
Step 1: Install and activate the plugin
You can also download it from the plugin directory, or search for it and install from your WordPress dashboard under Plugins > Add new. In case you are facing it difficult to install then move ahead to our guide on How to install a Plugin in WordPress.
The plugin will prompt you to create a directory page to show your listings after activating it.
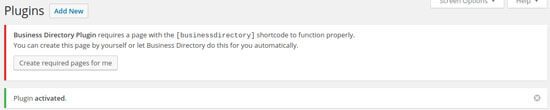
Step 2: Create your directory listing page
Just move ahead and click the “Create required pages for me” button to create the directory page.
You’ll see the new page has been created with the required shortcode under Pages on the dashboard menu.
Step 3: Adjusting your basic settings
You’ll see that there are two new menu options in your dashboard: Directory and Directory Admin. The first is basically for adding and managing your listings through the second has all the settings and options.
Move ahead and click on Directory Admin. You’ll see a little welcome message with links to documentation and quick start guides.
Then you can tap on the first button, Configure/Manage Options, to get started.
You can also choose options like:
- Enable reCAPTCHA for preventing spam submissions
- Set terms and conditions
- Publish submissions automatically or set them as pending until you approve them
- Enable and customize various email notifications to you and to submitters
- select your payment settings, including currency
Step 4: Modify your form fields
There are already some default form fields set up for a basic business directory. However, you can customize them by navigating to Directory Admin > Manage Form Fields.
Just review the current form fields and decide if there are any you’d like to add, modify, or delete.
Step 5: Create categories
You’ll see that with the current settings, Business Genre is needed which means we’ll have to set up categories. For this navigate to Directory > Directory Categories, and add them as you would for your posts. Just make sure to include an “Other” category in case a listing doesn’t fit the available options.
Step 6: Test your form
Navigate to your new business directory page (by default located at www.example.com/business-directory/) and click the Submit a Listing button.
Fill out the form and submit to make sure it works properly. You may want to log out of your WordPress dashboard and use an alternate email address to test the form. Just make sure to double check that any email notifications you have set up are working correctly.
Step 7: Link to your directory page
After you have verified that everything’s working as it should be, you can also add a link to your directory to your main menu.
You can also acknowledge adding a link to submit a listing (located at www.example.com/business-directory/?action=submitlisting).
Step 8: Let everyone know
Just make sure that the audience knows about your new directory!
Add a few listings yourself to get the ball rolling. Then after share your new directory on social media, your blog, your email newsletter, etc.
Wrapping Up
In this blog, we have shown you the complete guide to add a directory in WordPress site. We hope after reading this blog, you will have enough understanding how to add it properly. We hope you thoroughly read this article. Now it’s a wrap for this post. There are much more to explore.
If you feeling any sort of difficulty then you can always take help from our WordPress Migration team. We will be glad to help you. To get instant support service, Dial: +1-888-738-0846. We will be pleased to help you and solve the issue related to WordPress.