Have you ever wondered that, if it was possible to permanently delete a WordPress site from internet? The fact is that, by simply deleting your WordPress installation doesn’t mean that your WordPress site is permanently deleted from the internet. In this article, we will tell you how to permanently delete a WordPress site from internet. So read the whole article carefully.
When And Why Permanently Delete a WordPress Site
There’s a possibility that you need your WordPress website completely removed from the internet. You can simply delete all website files located in public_html folder or delete the WordPress installation right from the installed scripts. This will make your WordPress site unavailable but it will not be completely removed from the internet. So your website may still appear in search results, cached images or Wayback Machine.
The reason why your website still appears is that it is quite difficult to remove all traces of a website from the internet. As there are thousands of websites that aggregate content from other sites, publish screenshots, offer statistics and comparisons so there data may still remain. However with the steps highlighted in this article, you’ll be able to permanently delete a WordPress site from the face of internet.
Note: This article is about deleting your self hosted WordPress.org website. Don’t confuse it with a WordPress.com blog. There’s a different way to delete a WordPress.com blog.
Now let’s take a look at different steps to properly and permanently delete a WordPress site from internet.
Steps To Permanently Delete a WordPress Site From Internet
By using these steps you can properly delete a WordPress site and make it difficult to find.
Step 1. Create a Backup For Your WordPress Site
The very first step you need to do is to create a complete backup of your WordPress site. While doing so you might wonder that why do I need to backup my website when my intention is to completely remove it? Well, it is always a good practice to make a backup even though you want to delete your site completely. This will come in handy in case you change your mind in the future or want to access some content from your old website.
Step 2. Delete Your WordPress Website Files
Next step is to delete your WordPress files stored in your server. Removing these files will erase WordPress software as well as your themes, plugins, images and other media files.
You can do that, by following these simple steps:
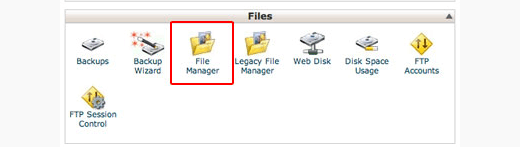
- Login to your WordPress hosting account’s dashboard.
- Locate the File Manager icon. It contains data of all the domains hosted on your account whether it be single domain or multiple domains.
- Now go to the root directory (public_html) and delete all files stored there.
You can also perform the same action by using an FTP client.
Step 3. Block Search Engines From Crawling Your Website
Once you have deleted your website, you need to block search engines to crawl your website URLs. You can do that by using robots.txt file to tell search engines that we don’t want our pages to be crawled.Remember, that robots.txt file is just a directive and we’ll be adding some code to stop search engines to crawl our website.
Follow the following steps:
- Create a new robots.txt file using file manager in cPanel or FTP.
- Edit it and add the following lines:
<!– code start –>
User-agent: *
Disallow: /
<!– code end –>
This code disallow all user-agents from accessing all URLs under your domain name.
Step 4. Removing Content From Search Engines
Even though your content was deleted the moment you removed your website but the search engines may keep showing it for sometime because of caching. Search engines understand that websites can go down due to technical faults.This is why they keep showing the content for a while hoping that your website will come back.
So you need to tell Search Engines explicitly that your content is no longer available, and it is removed permanently.
The best way to do this is by using the .htaccess file. Follow these steps to remove content from Search Engines through .htaccess:
- Create a new file in your website’s root directory and name it .htaccess.
- Next, edit the .htaccess file and add this code inside it:
<!– code start –>
RewriteEngine On
RewriteCond %{REQUEST_URI} !^/robots.txt
RewriteCond %{HTTP_HOST} ^www\.yourwebsite\.com$ [NC]
RewriteRule ^(.*)$ – [L,G]
<!– code end –>
Don’t forget to replace yourwebsite.com with your own domain name.
- Save changes.
This code will redirect all requests to your website and show 410 Error. However, it’d allow web crawlers to access your site’s robots.txt file.
Step 5. Remove Cached Snapshots From Wayback Machine
Once you’ve disallowed search engines and remove content using .htaccess file, the last thing you can do is to remove any available cached website traces from the Wayback Machine. Archive.org’s Wayback Machine is the world’s largest archive of websites.
In order to remove the cached versions of your websites from Wayback Machine is by contacting Archive.org and request them to remove snapshots of your content so they’ll never be included again.
FINAL THOUGHTS
We hope that the above article helped you to completely delete your WordPress Site from the internet as it is very simple to delete if you are following the correct steps as shown above.
So, users don’t worry if you are still facing problem in deleting your WordPress Site from the internet as you can also contact to our WordPress technical support team. Dial +1-888-738-0846(Toll-Free) to get instant service. We will be pleased to help you.