Everyone wants to build the next Amazon, but it’s not easy in reality. This means to say, building a WooCommerce multi-vendor marketplace is not as easy as creating a simple e-commerce store that you can easily dream of. It means buying and selling products internationally. But by finding some of the best WooCommerce multivendor plugins we make it easy for you;
Before that let’s talk about some important topics that you should know;
What is the WooCommerce Multivendor marketplace?
A WooCommerce multi-vendor marketplace is a market or a platform where you can sell and buy varieties of products. Depending upon the user’s perspective, you can sell your products as a vendor and buy products as a buyer.
With the help of a WooCommerce multi-vendor marketplace, you can host a small or large group of suppliers on your site. By doing this you can skip the hassle of ordering and storing the inventory. The vendors can easily deal with the inventory which gives you the right opportunity to manage your site.
Further on, a multivendor store allows you to sell your own products but if you are not capable enough to introduce your own products so you can allow other vendors (third-party) to sell their products on a commission basis on your online store. Thus, you can manage a stable revenue without investing heavily in it. For example, Amazon and eBay – both are suitable examples of a multivendor marketplace.
However, it has now become a popular business idea due to its convenience, simplicity, ease of use, and time-saving. Nowadays no one has so much time to go to the market and buy products.
Therefore, given its increasing popularity, people believe that it will occupy most of the retail market as soon as possible.
Note that a multi-vendor store can be a potential expansion of existing WooCommerce stores. Alternatively, you can think of starting a new e-commerce business in the form of a multi-vendor marketplace.
That’s it!
Now, as far as creating a WooCommerce multi-vendor store is concerned, you will need some things that will help you to create it and sell your product easily. Let’s see what they are;
Things to create a WooCommerce multivendor store
The following are the things you need to build an online marketplace;
- A domain name – For example, www.wpglobalsupport.com)
- Web hosting account
- SSL certificate – To accept payment securely)
- WooCommerce – The best WordPress plugin
- And an online marketplace addon or plugin – Free or Pro
That’s it
Next,
You must have heard that growth is the only way for the long-run of a business!
So a WooCommerce multi-vendor plugin contributes to developing a successful and long-term multivendor WooCommerce business. The simple concept of this is to introduce diversity and variety of products that help to increase the volume of consumers.
But when it comes to creating it so you can only create a multi-vendor store using WooCommerce multi-vendor plugins, but choosing the best one is a bit difficult task because there are a lot of plugins available over the internet for the same. We make it easy by explaining some points that a plugin should have to create a successful store;
Which plugin should you choose to create a WooCommerce multi-vendor shop?
To create a successful store you have to choose a plugin that has mentioned below features;
1. User-friendly frontend vendor dashboard
Note that while creating your multivendor store you need to make your vendor’s dashboard interactive and user-friendly so that they can add/edit/upload/publish their products easily. Further, it not only helps vendors to add and edit products but also makes all backend complex settings easy.
Your frontend vendor’s dashboard should have all the needed attributes like order management, order status, uploading products, adding a discount coupon, and a facility to improve SEO, etc. All these things are the most important for a vendor to sell their product efficiently.
2. Features to sale a single product via multiple vendors
This is one of the best features that a WooCommerce multi-vendor store should have because it allows you to sell the same product of multiple vendors on your multi-vendor store. In other words, with the help of this feature, multiple vendors can sell the same product in your store.
Not only this but it can also add the products of another vendor store to its own multi-vendor store within a single click and customize as they like. At the same time, this also helps customers to see the same product from multiple vendors and buy it by comparing their prices.
3. Hassle-free withdrawals and sales reporting
Withdrawal features are the most notable feature of any WordPress multi-vendor marketplace plugin. This is the reason why all multi-vendor stores should also have this feature for simple and hassle-free money withdrawals.
With the help of this facility, vendors can see the current balance and the minimum amount to be withdrawn on their dashboard. Note that requesting for withdrawal should be as easy as receiving it so that a vendor can easily see their earned money from their frontend dashboard and withdraw by choosing the desired payment method.
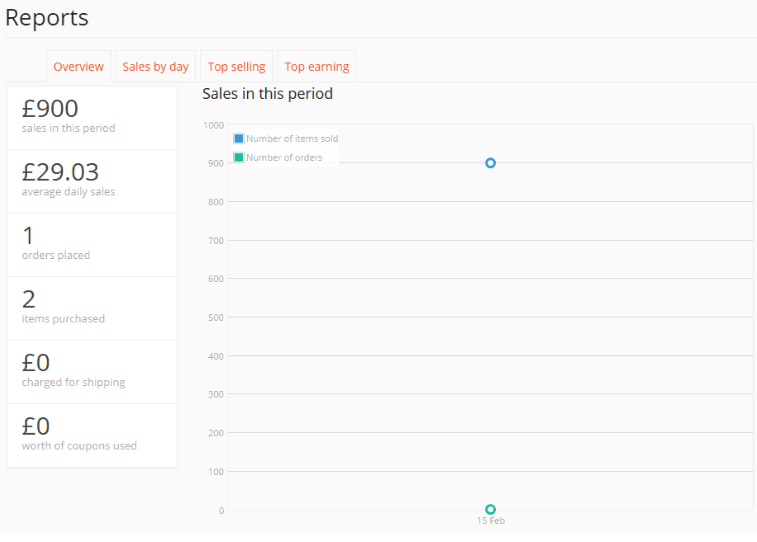
Apart from that, this feature also allows you to see the overall idea or report of your sales weekly, monthly, and yearly. See the below screenshot.
4. Easy order and shipping management system
It may be a bit disgusting for customers that a customer can easily make an order online but cannot track its updated information. This happens can create negativity that impacts your sale. Therefore, having this feature on your stores’ dashboards is necessary. It helps you to manage order status properly along with shipping updates.
5. Dedicated vendor store management
Having a dedicated store that you can easily manage allows you to face more opportunities. Therefore, you should keep the vendor managed. Because it makes your multi-vendor shop very popular and keeps you one step ahead of others.
This unique feature also allows vendors to add/edit their products anytime. Further, with the help of this feature, vendors can custom design their own store with some widgets. However, they can also customize or recreate their stores with headers, banners, or unique URLs.
That’s it,
Once you have all these things, let’s get started to create a WooCommerce store with the help of plugins;
Best Woocommerce Multi-Vendor Plugins
Basically, there are a lot of WooCommerce multi-vendor plugins that allow you to create a successful WooCommerce store. Here is the list of some of the best WooCommerce multi-vendor plugins;
- Dokan multivendor plugin
- YITH Multi-Vendor
- WC Marketplace
- Webkul Multi-Vendor Marketplace
- Socio Multi-Vendor for WooCommerce
- WordPress WooCommerce Multi-Vendor Marketplace Plugin
- Multi-Vendor Marketplace for WooCommerce
- WC Vendors
- Jigoshop
- Product Vendors
- Easy Digital Downloads (just to sell downloadable goods)
- WooCommerce PPOM
- Marketplace Multi-Vendor Price Comparison
- Multi-Vendor Coupon Marketplace
- Prestashop Multi-Vendor Marketplace
Now we will review each of the above plugins and finally determine which could be the best choice for a perfect multi-vendor plugin for your business.
Dokan multivendor plugin

With a rating of 4.5 stars, the Dokan multi-vendor marketplace plugin is one of the best frontend multi-vendor plugins to create a multi-vendor store. It is a fast and active approach to starting e-commerce with a complete front-end experience.
Moreover, this plugin provides a personalized dashboard to vendors so that they can easily manage and sell their products. The personal dashboard is customized to all needs. The backend access is allowed to admin only. Further, it also allows you to create a subscription package for vendors to show their products on your multi-vendor store.
This WordPress multi-vendor plugin comes with a free e-commerce theme that allows you to customize your dashboard easily. Apart from that, it has a lot of advanced features which are as follows;
Features
- Marketplace with Independent Stores
- Front-end Dashboard For Each Seller
- Earn From Each Sale
- Product Management
- Reports (Pro Feature)
- Coupon Management (Pro Feature)
- Manage Product Reviews (Pro Feature)
Pricing
When it comes to its pricing, it is available in free and various premium versions such as starter, professional, business, and enterprise.
| Free | Starter | Professional | Business | Enterprise |
| $0.00/year | $149/year | $249/year | $499/year | $999/year |
| Unlimited vendors | Commission types | Vendor review | WC Booking Integration | 1 hour of theme compatibility |
| Frontend vendor dashboard | Frontend Products | Store Support | Geolocation | 1 hour of theme compatibility |
| Order management | Vendor management | Seller Verification | Export & Import | Live chat support |
| Vendor withdraw system | Powerful reports | Paypal stripe & More | Staff manager | 17 Premium Modules |
| Store Widgets | Social login | Ticket based support | 17 Premium Modules | Priority support |
| 1 Site license | 3 Site license | 5 Site license | ||
| Ticket Based support | Subscription | Ticket based support |
To see pricing & features in detail
You can see that its premium versions come with advanced features.
Installation of the plugin
Follow the listed below steps to install the plugin;
- Go to the Dokan official website and download the plugin.
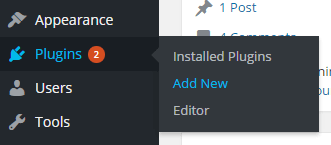
- Thereafter, open your dashboard and navigate to Plugins>>Add New>>Upload File.
- Now press the “Choose File” button and select the dokan.zip file you have downloaded from its official website and upload it.
- Once uploaded, click the Activate button.
Setup wizard of the plugin
- Store setup: Enter the URL of your store and choose who will be the “Extra Fee Recipient” between the admin or vendor.
- Selling setup: Here mention the vendor commission percentage and enter the amount.
- Withdraw setup: Enable the withdrawal methods like PayPal, your bank, or skrill to pay your vendors
- And lastly, press the “Setup your Dokan” button.
WordPress configuration with this plugin
Here you need to configure your WordPress setup so that your WordPress site can work properly with this plugin. By default, the registration form is not enabled in WordPress, you need to enable it on your own to add vendors. Therefore follow the listed below steps for the same;
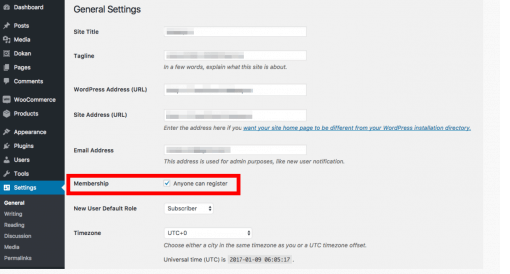
- First of all, open your WordPress and go to wp-admin>>Setting>>General.
- Thereafter, check the “Membership – Anyone can register” box.
- And click the Save button. See the below screenshot.
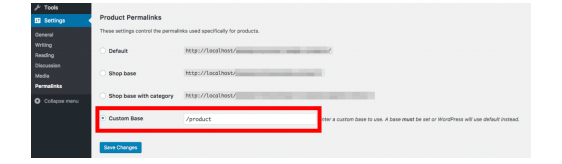
Next, you need to configure your permalink to work with the front-end templating system of the Dokan plugin. For this;
- Go to Setting>>Permalink in your WordPress dashboard.
- Choose the “Post Name” button.
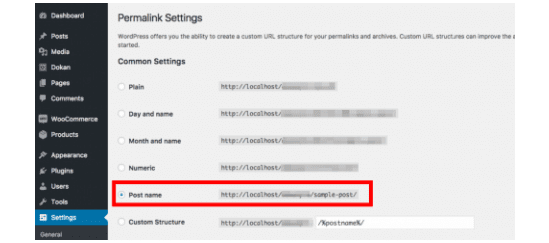
- Thereafter, you will choose the “Custom Base” button and write “/product” on the box.
- And lastly, press the Save button. See the below screenshot.
- You already have downloaded your plugin, now setup your account whether you use Dokan or any other WoCommerce multivendor plugin you will have to configure the following settings;
- Payment Gateway
- Shipping methods
- New vendor product uploads
- Admin commission percentage upload
For the complete steps, the list goes for its documentation.
There is also another option to start your multi-vendor marketplace is choosing Dokan starter plans. You wouldn’t need to choose, download, and configure a multi-vendor plugin. All the required things to start an online store come with a starter plan like this;
- Managed WooCommerce hosting
- Jilt to manage abandoned cart
- PayPal for WooCommerce
- Shipping management
- Ticket based support
- Order email notification
- Storefront widgets
- Admin & earning reports
- Social & login registration
- Coupon creation
- And many more
A dokan starter plan is a good option for a small startup. Going with this plan means saving your money.
YITH Multi-Vendor
YITH Multi-Vendor is another plugin that allows you to create a market where many other people can sell their products and earn a profit for each sale. It does not have a front-end dashboard for vendors. With this YITH plugin, you can efficiently manage multiple vendors on your site. Also, you can use this plugin to gather more information about each vendor, and many admins can set up your site.
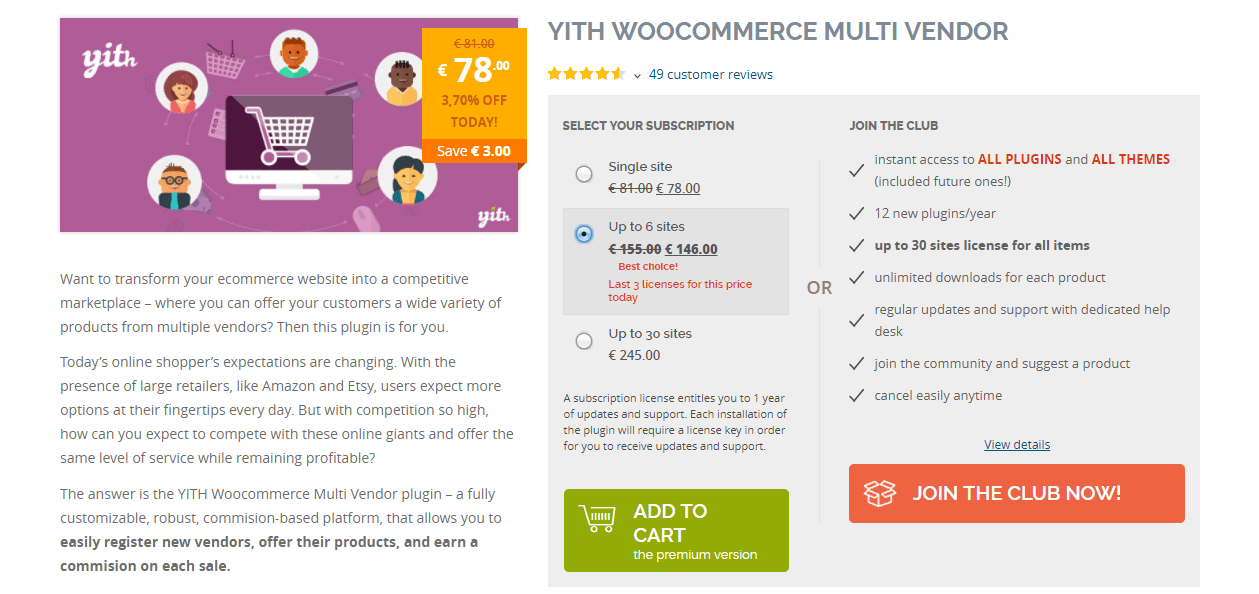
It will allow each vendor to manage the setup of their products individually. In addition, there is complete freedom in setting commission rates. Depending on your convenience, you can choose it based on each product or seller. Additionally, it enables easy payment processing with an immediate pay button on WooCommerce Admin Side.
The plugin also lets you permit a lot of freedom sellers to set up their own sales strategy. They can independently manage coupons and answer product reviews.
In fact, it will take a lot of burden from the owners of the store to manage the site on a daily basis. And, for the overall management of the store, there are intuitive features that can save you from many troubles. You have the option to apply global changes to the stores that appear applicable to all vendors.
Similarly, if you need it, some vendors may choose not to display the product. In addition, you can generate practical reports that will help you understand the performance of the store.
Therefore the plugin has many features that enable easy communication between your vendors and customers. You can buy this plugin’s single-site license for $99.
Installation:
Download the free version
- First of all, you have to download and activate the WooCommerce plugin, because without it YITH WooCommerce Multi-Vendor cannot work.
- Now download the .zip file from its official website and unzip this.
- Thereafter, upload the plugin folder into the directory wp-content/ plugins/ of your WordPress site.
- And active it from the YITH WooCommerce Multi-Vendor Plugins page
Configuration
YITH WooCommerce Multi-Vendor will add a new tab called “multi-vendor” in the “YITH Plugins” menu item. There, You will find all Yithemes plugins with quick
access to the plugin setting page.
WC Marketplace
WC Market is a free plugin for WooCommerce. It is also one of the best multi-vendor plugins for WordPress. It offers bouquet features that you can see in other premium plugins. Also, you can efficiently manage a large number of vendors in your store by using this plugin. You can manually accept new vendor registrations or automatically, and manage many aspects using a bulk action.
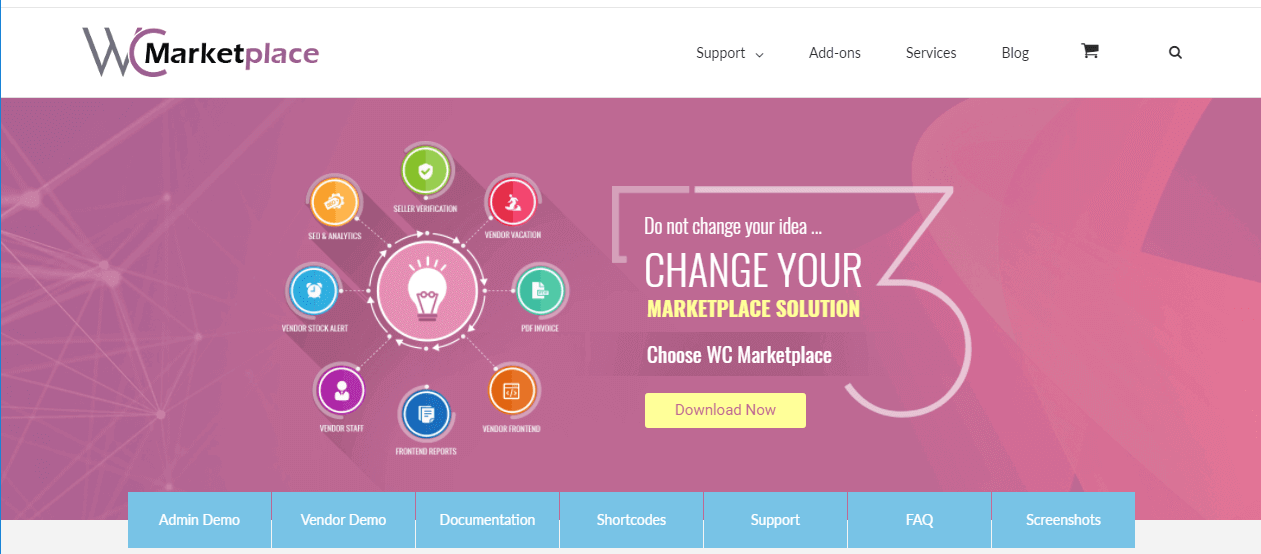
Apart from this, you can set specific commissions for products, vendors, or globally through the entire website. Payments can be done immediately with a button click or scheduled for a later time. It supports PayPal and Stripe payment gateways.
In addition, there are many features in the plugin that enable a simple registration process for vendors. And, if you want any optional features, you can also see some of their add-ons. With over 150 five-star ratings and over 7,000 active installs, it’s really popular in the WordPress community.
Installation
WC Marketplace plugin is an extension of WooCommerce, so this WooCommerce multi-vendor plugin must be installed and activated on your WordPress site for this plugin to work properly.
- Download and install the WC Marketplace plugin using the built-in WordPress plugin installer.
If you download the WC Marketplace plugin manually, make sure it is uploaded to /wp-content/plugins/ and activate it through the menu Plugins in WordPress. Or follow the steps below:
Plugins>>Add new>>Upload plugin>>Upload dc-woocommerce-multi-vendor.zip>>Install Now>>Activate Plugin. - Configure as you see fit, under WCMP>>Settings.
- Configure email notifications from WooCommerce>>Settings.
- View Commissions under WCMP>>Commissions.
- After that, View reports WCMP>>Reports.
Webkul Multi-Vendor Marketplace
Webkul multivendor marketplace is a plugin that provides a multi-vendor environment that is easy for both vendors and store owners. Both the seller and the store owner have the freedom to edit and manage product information.
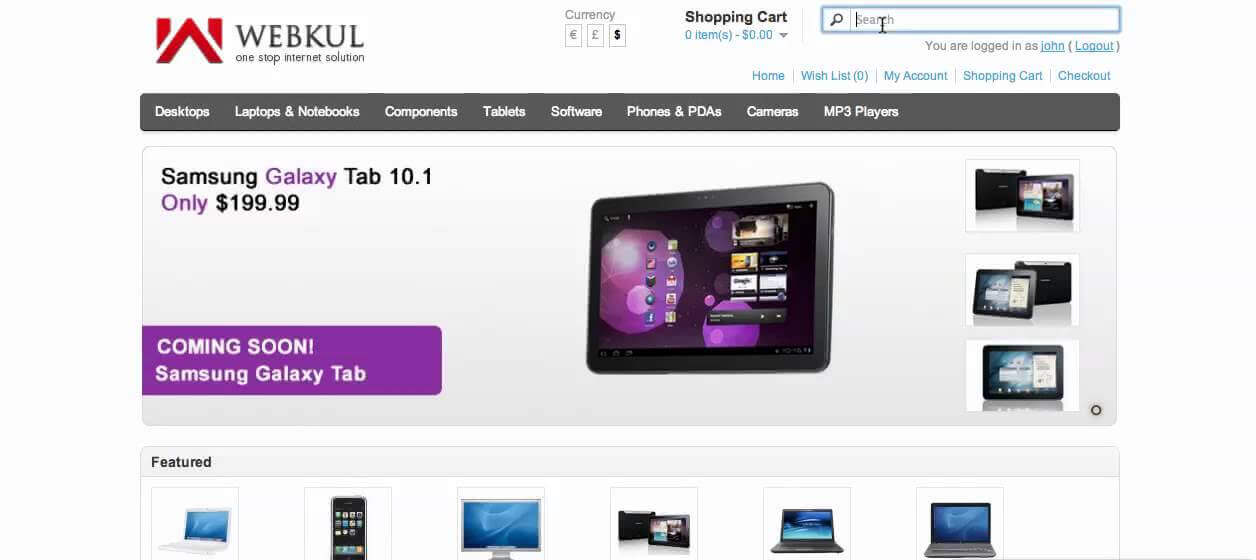
Features like installation commission, approving vendors, etc. are reserved only for the store owner. If you work on your store, you can set a separate commission for different sellers.
This WordPress multi-vendor plugin also ensures that the URL structure is SEO-friendly to ensure a good search engine ranking for your website. After all, the success of the marketplace lies in its ability to reach the maximum number of viewers.
You can buy this plugin for $ 99.
- The user will get a zip file which needs to be uploaded in the “Add New” menu option in the WordPress admin panel.
- For this login to the WordPress admin panel and hover your mouse over the “Plugins” menu option select the “Add New” option.

- After this, the user will see an option on the top of the page that is “Upload Plugin”, click the option to upload the zip file.

- On clicking the “Upload Plugin” option, the user will see a “Choose File” button. Click on the button to browse for the zip file as per the image below.

- After browsing the file, click on the “Install Now” button so as to install the plugin as per the snapshot.
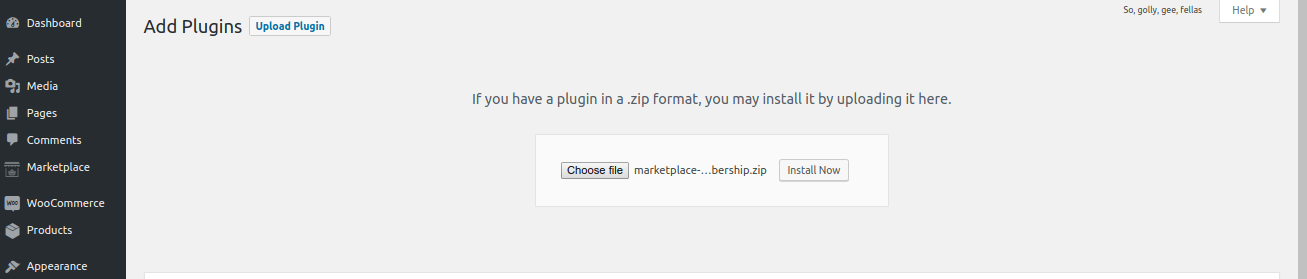
- Once the user installs the plugin, a message “Plugin installed successfully” displays and an “Activate Plugin” is visible to activate the plugin. The user needs to click on the “Activate Plugin” button to activate the plugin.

Socio Multi-Vendor for WooCommerce

The Socio Multi-Vendor plugin holds a rating of 4.5 stars from the users. It is a WordPress extension used to convert your WooCommerce site into a Multi-vendor. The plugin fulfills the purpose of adding vendors and selling their products on your site. All the rights of adding and removing a vendor are set for admin only.
The plugin works for all types of products. But each product is sold by only one vendor. And it supports all payment gateways that work for with WooCommerce. Another important feature of the plugin is as follows:
Key Features
- Vendors submit an application from the Front-end and create a product form product that will display after admin approval.
- The commission rate is set by admin only for different levels like product level, vendor level, and global level.
- An additional option for adding the shipping cost to vendor commission.
- Shortcode support to keep eye on vendor logs and applications.
- Email notification for vendor application status.
Installation
There are two ways to install the Plugin. One is the Automatic Installation and another is the Manual
Installation.
Automatic Installation:
- Automatic Installation is the easiest option as WordPress handles the file transfers and you
don’t even have to leave your web browser. To do an automatic install of Socio Multi-Vendor,
log in to your WordPress admin panel and go to Plugins>>Add New. - In the “Upload” field browse the Plugin zip folder “multivendor.zip” and click upload. You can install
it by simply clicking Install Now. After clicking that link you will be asked to activate the plugin or
return to the plugins page. Click Activate Plugin and the installation will automatically complete.
Manual Installation:
- Unzip the Plugin zip file (“multivendor.zip”).
- Using an FTP program or your hosting control panel, upload the unzipped Plugin folder to your
WordPress installation’s wp-content/plugins directory. - The Plugin works once you click “Activate”.
WordPress WooCommerce Multi-Vendor Marketplace Plugin
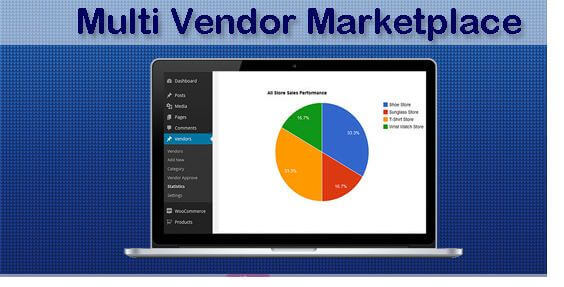
The WooCommerce Multi-Vendor Marketplace plugin has a rating of 3.5 stars. This WordPress WooCommerce multi-vendor plugin encourages you to build your own marketplace where other vendors can sell their real goods, virtual products, or download any products. As well as the setup of the plugin is fast and easy too. Other features of plugins are as follows-
Key features
- Only the admin has the power to allow vendor stores with a certain set commission rate.
- You can monitor all your store sales.
- Individual admin panel for each vendor to add products.
- Vendors can see the statistic of product sales, order status, and payment status from their profiles.
Installation
Automatic Installation
Automatic installation is the easiest option as WordPress handles the file transfers itself and you don’t need to leave your web browser.
To do an automatic install of WooCommerce Multivendor Marketplace, log in to your WordPress dashboard, navigate to the Plugins menu and click Add New.
In the search field type “WooCommerce Multivendor Marketplace” and click Search Plugins. Once you’ve found our eCommerce plugin you can view details about it such as the point release, rating, and description. Most importantly, of course, you can install it by simply clicking “Install Now”.
Manual Installation
- Download your WordPress Plugin to your desktop.
- If downloaded as a zip archive, extract the Plugin folder to your desktop.
- Read through the “readme” file thoroughly to ensure you follow the installation instructions.
- With your FTP program, upload the Plugin folder to the wp-content/plugins folder in your WordPress directory online.
- Then, go to the Plugins screen and find the newly uploaded Plugin in the list.
- Click Activate to activate it.
Multi-Vendor Marketplace for WooCommerce
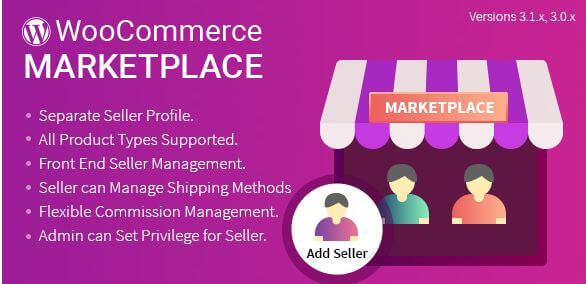
The plugin turns your e-commerce store into fully functional multiple vendor marketplaces. WordPress WooCommerce Multi-Vendor Marketplace Plugin has a rating of 4.5 stars. Other features of the plugin are as follows-
Key features
- The plugin allows the vendor to create a separate profile. And the profiles are approved by the admin.
- Vendors can monitor the sales and transaction records of their products on their dashboards.
- Facilitates inventory management.
- Admin has the power to edit the profile of any vendor.
Installation
Automatic Installation:
Automatic installation is the easiest option as WordPress handles the file transfers itself and you don’t need to leave your web browser.
Thus, to do an automatic install of WooCommerce Multivendor Marketplace, log in to your WordPress dashboard, navigate to the Plugins menu and click Add New.
In the search field type “WooCommerce Multivendor Marketplace” and click Search Plugins.
Once you’ve found our eCommerce plugin you can view details about it such as the point release, rating, and description. Most importantly, of course, you can install it by simply clicking “Install Now”.
Manual Installation:
- Download your WordPress Plugin to your desktop.
- If downloaded as a zip archive, extract the Plugin folder to your desktop.
- Read through the “readme” file thoroughly to ensure you follow the installation instructions.
- With your FTP program, upload the Plugin folder to the wp-content/plugins folder in your WordPress directory online.
- Go to the Plugins screen and find the newly uploaded Plugin in the list.
- Click Activate to activate it.
WC Vendors
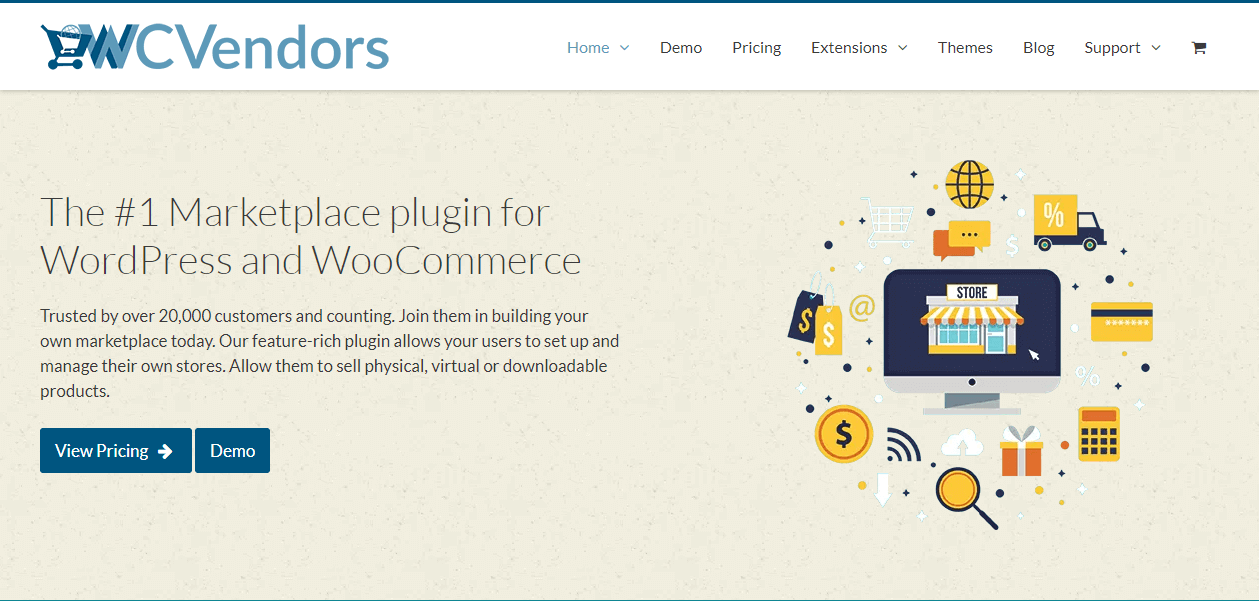
WC Vendor Pro is a popular multi-vendor plugin with good and advanced features. It became popular with its unique marketing strategy and support. However, the front end is not in the rolling steps. If you want a minimum capacity with front-end features of the Multi-Vendor marketplace and have a tight budget, then this plugin is most suitable for you. Get an overview of plugin features-
Key Features
- The professional-looking dashboard makes the sales reports quite convenient.
- It offers vendors to add their shipping rates for each product through a table of rules.
- Some other aspects of this plugin feature list are multiple commission types, coupon management, and fully customizable store banners, etc.
- The plugin is available for purchase at $149, which includes one year of support and updates.
- Supports PayPal and stripe payment gateways.
Vendor approval capabilities, automatic scheduling for payments, and many more.
Create your own WooCommerce multi-vendor with this plugin
- First of all, open your WordPress dashboard and go to Plugin>>Add New.
- Thereafter, search for the plugin by entering the plugin name. Install and activate it.
- After the installation and activation plugin, go to WC vendor>>Setting page to configure marketplace settings.
- In WC vendor>>Setting, first of all, you will go to the General tab, here you have to enable the Registration box so that users as vendors can sign up easily. Review other options and press the “Save changes” button to save your setting.
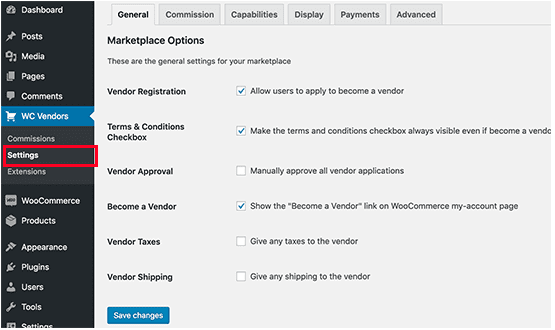
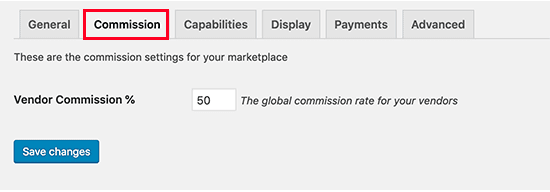
- Next is the commission tab where you will set commission for your vendor.
- Thereafter, you will go to the ‘Capabilities’ tab to set the sitewide rules for vendors. In this tab, vendors can view & edit products and orders. Further, you will see three sections under this tab; Permission where you can enable or disable functionality for your vendor. Next is ‘The product section allows you to choose which type of products vendors can add. Lastly, Order section, here you can choose the option that you want to see your vendor about the order.

- Once you set up the capabilities tab, now set up your marketplace-related pages.
- To set up pages, navigate to the ‘Display’ tab next to ‘capabilities’. Then go to Pages>>Add New under this tab to create a new page for each item. After that add the shortcode displayed in the settings to the content area of pages.
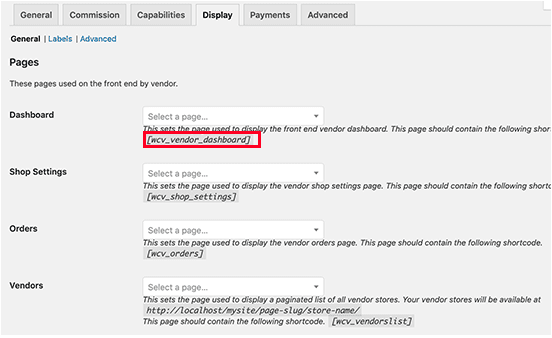
- When you have created all pages and added shortcodes, you can choose them from here.
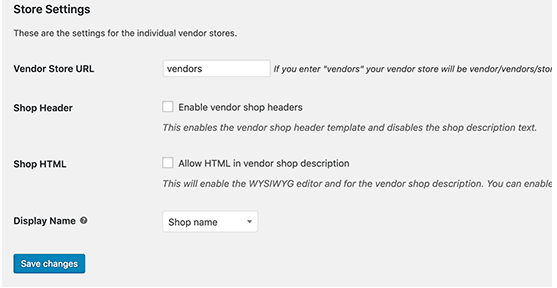
- On the same page below these pages, you will see the ‘Store setting‘ option. Here you can choose a prefix to use in Vendor shop URLs. Also, here vendors can set custom headers for their shop pages and use HTML in shop descriptions.
- Next is the ‘Payment’ tab to set up payment for your vendors. We suggest to vendors use manual payments because it gives customers enough time to request refunds or feedback.
- After choosing the payment gateway, you will need to set it up by entering your API keys. After all, press the save changes button to save your settings.
That’s it! Now, this multi-vendor for the WooCommerce plugin is ready to work with you. You just have to set up your WooCommerce for the multi-vendor environment.
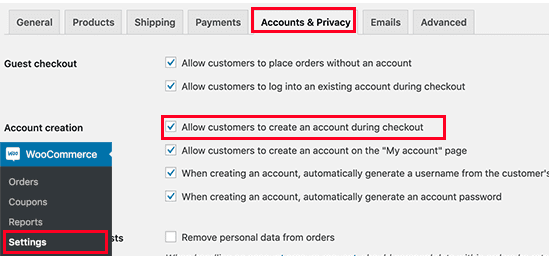
Enable account management in WooCommerce
- To do this, go to the WooCommerce>>Settings page and press the ‘Account’ tab. Here you will have to enable the boxes that are next to the customer registration option. After doing this press the save changes button.
Now your WooCommerce multivendor marketplace setup is finished. Next,
Setting up navigation menus
Set up your navigation menus for the ease of your users.
- For this, navigate to Appearance>>Menus page in your WordPress dashboard. After that add your user account and checkout pages to the navigation menu. Lastly, press the save changes button.

- Note that if you don’t have a My Account page, simply create it by adding ‘[woocommerce_my_account]’ in the post editor.
That’s it!
Jigoshop

Jigoshop is a way to convert your WordPress website into a vibrant eCommerce store. You don’t need a long time to set up the plugin and provide a perfect e-commerce solution. Gives an extensive amount of shop settings like country, currency, catalog options, and stock management. Other features of plugins are;
Key features
- It provides unlimited tax, shipping, and payment gateway settings.
- Features:
- The plugin provides different reporting features to get the real-time status of your shop.
- Better inventory management of your shop.
- Routine notification of product inventory status to avoid out-of-stock.
- Over one hundred extensions that push the boundaries of your eCommerce store.
Installation
You can either use the Automatic WordPress plugin installer or do a Manual installation.
- In the WordPress admin, go to Plugins>>Add New.
- In the search term, type in ‘Jigoshop’ and click Search Plugins

- Click the Install Now button on Jigoshop – WordPress eCommerce

- Download the Jigoshop plugin file from WordPress.org.
- Unzip the file into a folder on your computer.
- Upload the folder /jigoshop/ to the folder /wp-content/plugins/ on your site.
- Visit the plugins page in WordPress admin to activate the Jigoshop plugin.
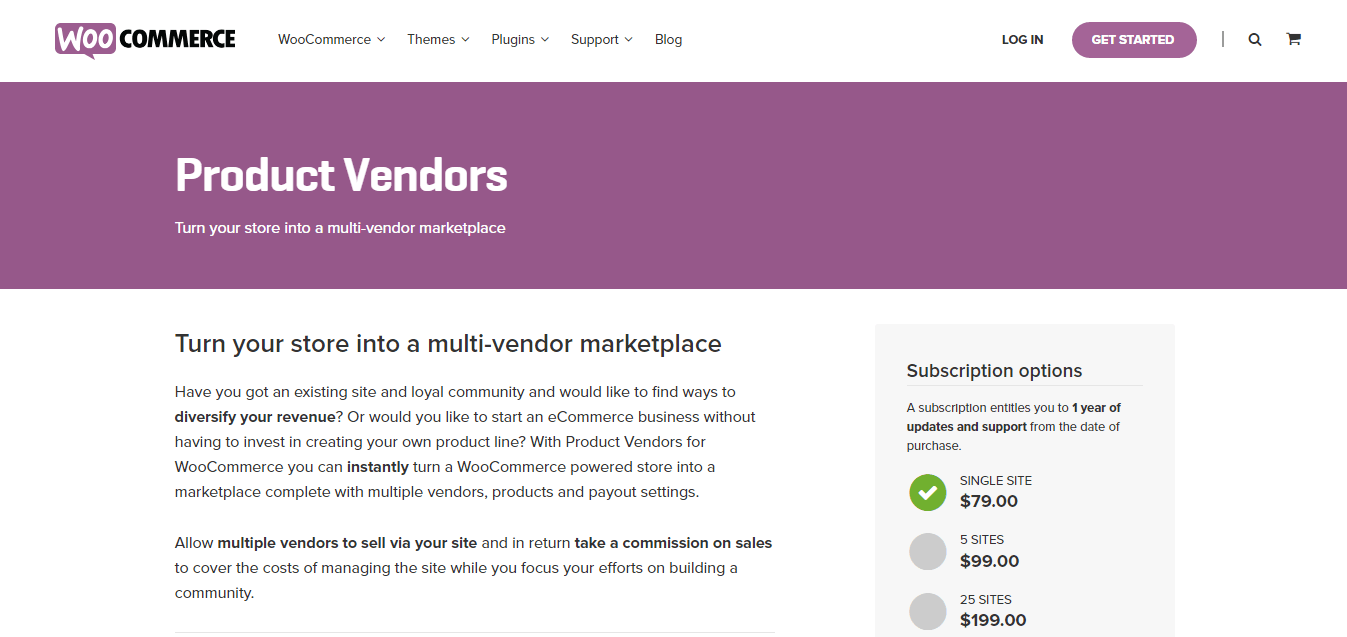
Product Vendors
This is WooCommerce extension helps you to turn your online store into a marketplace with various vendors, many products, and suitable payment options. Therefore you can take a commission from the vendors so that they can sell on your site, which has your fan. The main advantage of this WordPress WooCommerce multi-vendor plugin is that you can facilitate all types of products in the store, and even include bookings.
WooCommerce Product Vendors has been updated on 2017-12-11 and a lot of features have been added to the last update. However, it still has a long way to go to compete. Though you can set the vendor-specific commission rate by using this extension.
The interesting thing is that you can use this feature to reward new vendors who are involved in their marketplace by setting a lower commission during the initial period.
It will be different from the global commission rate that you have established on your site. And, if you do not want to add hassles to the store management, so you can let each vendor control the admin side for their respective products.
You can set up the payment process, just like vendors are paid after the order is completed. There is also an option to delay payments in order to deal with the customer’s possibility of returning products. In addition, this WordPress multi-vendor marketplace plugin provides sales reports that allow you to have a bird’s eye view of sales, seller income, commission, etc.
You can buy a single website subscription to the plugin for $79. 5 site subscription is $99, and 25 sites are $199.
Why use Product Vendors?
- Create a marketplace that can sell anything. From physical, hand-made products to digital downloads like photographs, themes, fonts, audio or video, and even time-based bookings with our integration with WooCommerce Bookings.
- Continue selling your own products. Display vendor products for sale right alongside your own products.
- Set vendor-specific commission rates. Incentivize new vendors to join your marketplace or reward loyal or high earnings with vendor-specific commission rates – while still setting a separate base commission rate across your marketplace.
- Reduce your admin. Allow vendors to manage their own products. Give vendors the ability to manage their own products.
- Don’t pay commissions on orders that are not completed. Set commissions to only are assigned to vendors once the order is completed.
- Stay on top of your marketplace with sales reports. Get an overall view of vendor sales, commissions, and earnings per month by the vendor.
- Delay commission payments to account for returns. Use PayPal Mass Payments to delay commission payments in case of returns on physical products.
Installation
- Download the .zip file from your WooCommerce.com account.
- Go to Plugins>>Add New to upload the file you downloaded.
- Thereafter upload and activate the plugin.
Two custom tables are created in your WooCommerce database: wcpv_commissions and wcpv_per_product_shipping_rules. Per Product Shipping, PayPal Payouts and Email Notifications are built into Product Vendors.
Easy Digital Downloads (just to sell downloadable goods)
Easy Digital Downloads is a free WordPress plugin to sell digital downloadable products. Just like WooCommerce, the free plugin contains the core functionalities but to make the plugin for specific use like digital products marketplace, you need to buy some paid add-ons of the Easy Digital Downloads.
Key features
- Frontend submissions – turns your site into a full-featured digital marketplace website like Themeforest, Codecanyon, or TemplateMonster – where anyone can sell their downloadable products and has a frontend panel to manage their account and products
- Commissions – Adds the revenue sharing system between site owner and sellers
- Wallet – lets buyers have the option to deposit funds into their accounts
- Rating – The rating system is a must-have part of a marketplace website and so is this extension
However, there are many other paid extensions for Easy Digital Downloads available to beef up marketplace functionality (Stripe, Discount Pro, Authorize.net).
Installation
- Activate the plugin
- Go to Downloads > Settings and configure the options
- Create Downloadable products from the Downloads page
- Insert purchase buttons for any download via the “Insert Download” button next to the Upload Media buttons
- For detailed setup instructions, visit the official documentation page.
WooCommerce PPOM

PPOM is basically for Personalized Product Option Manager, this plugin adds an extra input field on your product page in order to personalize your product.
You can simply drag and drop in the input fields with many options. Prices can also be added using those options as well as all the data will be attached to the order and the email.
It is one of the most customizable WooCommerce Product Add-ons having more than 21 input ways to customize your product.
Customers prefer your products individually like a check for a T-shirt, text on mugs, uploaded images for a logo or visiting card, etc. before the check. Set prices against options, show conditional or user roles to the field, and much more with PPOM
Installation
- Firstly, upload the plugin directory to the WordPress directory i.e /wp-content/plugins/directory
- Then activate the plugin through the plugin menu provided in WordPress.
- Once the activation is done, set options from WooCommerce by going to the PPOM Settings menu.
Marketplace Multi-Vendor Price Comparison
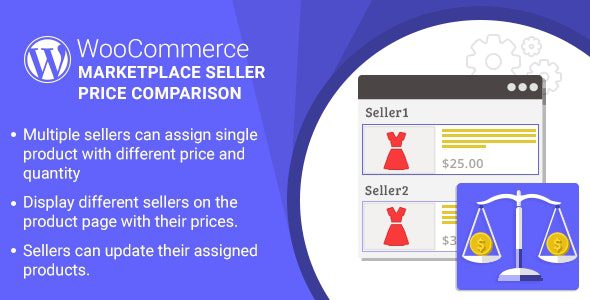
The marketplace Multi-Vendor Price Comparison plugin is one of the best Plugins for WooCommerce. This plugin provides you the facility to compare the prices for a single product among many different sellers. In addition, all the different sellers will be displayed on the product page, who are currently selling the same product.
Although the buyers are able to select the product from them based on the product reviews or on the basis of price. In addition, a seller can add the product that is available with different stock units, prices, and conditions in the global catalog. Basically, this plugin allows the sellers to update and also delete their assigned products of them.
In addition, multiple sellers are able to assign the same product which is available in the global marketplace. For instance, if there is a product of Apple iPhone that is currently available in the marketplace and a seller wants to sell the same product. But on the different quantity and price. Therefore it can be done with the help of this plugin.
So now the different sellers named A, B, and C can add that same product with different prices unit and stock units. However, the admin has the power to make a simple product or a variable product a global product. In addition, the admin can make the product available to the sellers. So that the different sellers can sell the same product at their own different prices.
Although once a seller assigns the product, then it will work as a normal product. Therefore a seller will be able to delete or update the assigned product. Besides that, the admin can configure whether approval is required to publish an assigned product or not. Thus if the admin disallows it, then admin approval is required to publish a product.
Therefore the seller first needs to search for and assigns a product. After that, the seller needs to send it for approval to an admin. Hence once the admin person approved the product, then the product will be visible on the shop products list. In addition, if the admin allows it then the product will be auto-approved.
However, a buyer can see all the available sellers on the product page, who are selling the same product. So now the buyer is able to compare all those sellers. And he can add the product to the cart from a seller who has low prices and good reviews such as Flipkart, Amazon, or any other genuine marketplace. Besides that, a seller can manage the stock of assigned products.
In addition, the seller is able to update the quantity of the product on the basis of his requirements. However, the admin can also decide which kind of products he wants to showcase on the list of his online shop products. Also, the admin can allow displaying all the products, base products, or cheapest products.
Key Features
- Admin is able to configure whether approval is required to publish assigned products or not.
- Admin can also make any simple product or variable product into a global product.
- Display different sellers on the product page with their prices.
- Admin can allow displaying All Products, Base Products, or Cheapest Products on the marketplace.
- Product stock management for sellers.
- Sellers can also update their assigned products and sellers can also delete them.
- Multiple sellers can assign the same product with different prices, stock units, and conditions.
Pricing: You can buy this plugin at the required cost of just $69 only. However, you can extend the support up to 12 on just $24 only.
Multi-Vendor Coupon Marketplace
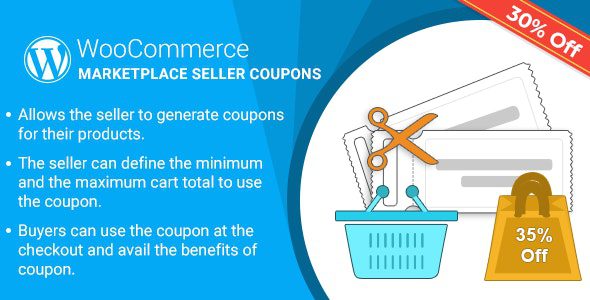
WordPress Multi Vendor Coupon Marketplace Plugin for WooCommerce is one of the best options for Marketplace Sellers. This plugin allows the seller to generate some coupons for their online products. In addition, the seller can also give a discount to their customers with the help of a coupon code.
Although the customer can also use that coupon code with their purchase at the time of checkout so that they can take the advantage of the discount. However, this coupon code will clearly identify who has purchased items. Basically with the specific coupon code is able to quickly identify whether your promotion code is successful or not.
However, it is proven that it will increase your conversion rate just by adding coupons for discounts or free shipping. Although if you are using special discounts in your traditional advertising, direct mail, or emails. Then you will see a spike in traffic to these relevant pages.
Key Features
- This plugin enables the seller to produce coupons for the products.
- How many times a coupon is used can be set by the seller?
- The seller is able to set how many times a client can use the coupon.
- How many times a coupon will be applied to a product can be set by the seller.
- The seller can define the maximum and the minimum cart total to use the coupon.
- How many selected customers use the coupon can be allowed by the seller?
- The seller is able to restrict any particular email as well from using the coupon.
- Also, the seller can allow a coupon for a specific product and category.
- The seller can check the coupon history.
- Buyers can use the coupon at the checkout and avail of the benefits of coupons.
Pricing: You can buy this plugin at the required cost of just $62 only. However, you can extend the support up to 12 for just $21.38 only.
Prestashop Multi-Vendor Marketplace
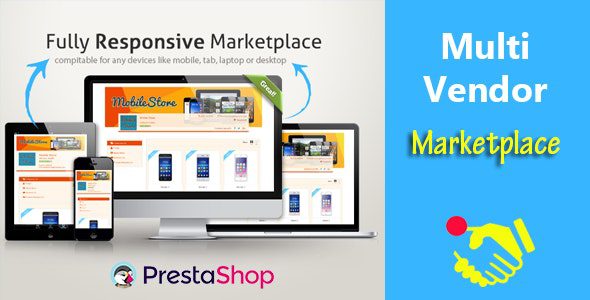
Prestashop Multi vendor Marketplace module is well-suitable and also one of the best tools. Basically, this plugin can help you to build many types of marketplace. In addition, this can enable store owners or vendors to supply their products or sell them from their own websites. Certainly, this plugin can help you to establish your own marketplace much easy, reliably, and very fast.
In addition, with the help of this module, the owners of the marketplace will receive commissions on such products that they sell from their vendor stores. Also, the marketplace owners are able to set up the multi-store system on their websites. Therefore the other store owners can also sell their own products from his website.
However, only the super admin has the capacity to approve the online store from the dashboard. In addition, the admin can also set up the percentage or commission rate with other information for a specific vendor store. Although admin also has the power to temporarily disable all the markets. However, with the help of this plugin, the admin can also monitor all the sales performance of the store.
Basically, each store owner or vendor has their own individual admin panel. Therefore the vendors are able to add virtual or standard product items with a lot of other information. In addition, the store owners can check all their orders. Also, the vendor can withdraw any amount from his total sales. And the percentage will be automatically added to the marketplace owner after his approval.
However, it has a powerful reporting system with product sales, order, and withdrawal reports. The vendor can set images, social links, popup schedules, grid box content, store info, and store page content with the store design. Also, the store owner can edit and update his profile from there. Besides that, it has also had a store rating and Quantity alert options.
Basically, the Prestashop Multi vendor Marketplace module is a Prestashop extension plugin that turns your Prestashop Site into a Multi-Store Marketplace. Also, the Prestashop Multi vendor Marketplace has a few amazing features, and it’s very easy to set up. It is compatible and very flexible with many existing modules in the Prestashop repository. This module is fully customizable. Users can configure the module very easily in the existing or new Prestashop store.
Although after installing the Prestashop Multi vendor Marketplace module it will then build three-page links these are vendor registration, vendor list, and vendor dashboard. However the dashboard contains order, settings, withdraw, profile with other info, report, and Add/View product. In addition, the vendor can log in or register from the registration page and all vendor lists will show on the vendor List page.
Key Features
- Anyone can register for a store that goes to the site admin for approval.
- The marketplace owner has the ability to approve a store from the dashboard by enabling, disabling, viewing, or Deleting a specific vendor store.
- The Super admin is able to view and approve all requested product lists.
- Multi-store system for Prestashop.
- Only the marketplace owners can send payment to the store owners.
- Marketplace owners can view the vendor’s Store, Product, and Order Report.
- Marketplace owners can view Product info, Sale info, and Profit and can set the Commission rate or percentage for a specific vendor store.
- The marketplace owner can monitor all store sales status.
- Each Vendor/Store owner has an individual Admin panel that contains Products, Order history, Total Sales, Admin Percent, Store Progress, Sales Status, and other info.
- In the dashboard marketplace owner or super admin can view the total stores or vendor list, Total Products, Store Waiting for Approval, Total Store Orders, Withdraw Status, Sales Status, etc.
- The vendor can add products with Information, Category, Price, SEO, Quantities, Combination, Image, Image Galleries, and Special Prices. He can view his entire product list in this section. The vendor can add/upload Standard and Virtual (services, booking, downloadable products, etc.) products.
- The restaurant owner can view his Order list with details.
- The vendor can withdraw any amount from his total sales balance and the percentage will automatically add to the marketplace owner after he approves.
- It has a powerful reporting system with orders, product sales, and withdrawal reports.
- The vendor can set store information, upload the store’s logo and banner, popup schedule, social links, store page content, and grid box content with store color design.
- The store owner can edit or update his profile.
- The vendor can view Store ratings based on his products.
- There is a Quantity alert option where the store owners can view fewer quantity products.
- The user or customer can view all store lists with the logo. After clicking a store, customers can view the store’s Profile, Collections, Reviews, and other info.
- Find / Search a vendor store by Zipcode, Name, or Address.
Pricing: You can buy this plugin at the required cost of just $149 only. However, you can extend the support up to 12 for just $54.38 only.
Conclusion
The Multi-Vendor Marketplace is a trending e-commerce business idea that provides many opportunities for passive income. The enticing factor of the multi-seller shop is that you can successfully run a WooCommerce store without your own product.
However, it still comes with various challenges in-store management, sometimes it is difficult to get even from a personal store.
If you are using WooCommerce, there is no shortage of options to help you establish a multi-vendor marketplace.
By using the given WordPress WooCommerce multi-vendor plugin you can easily attract more and more customers and can earn a good amount of income.
We hope that this article helped you find a useful WooCommerce multi-Vendor solution for your online shop and its installation process. If you have any query use the comment section below.
Furthermore, if you are facing a problem related to WooCommerce Setup talk to our WordPress Experts dial +1-888-738-0846 (Toll-Free).